
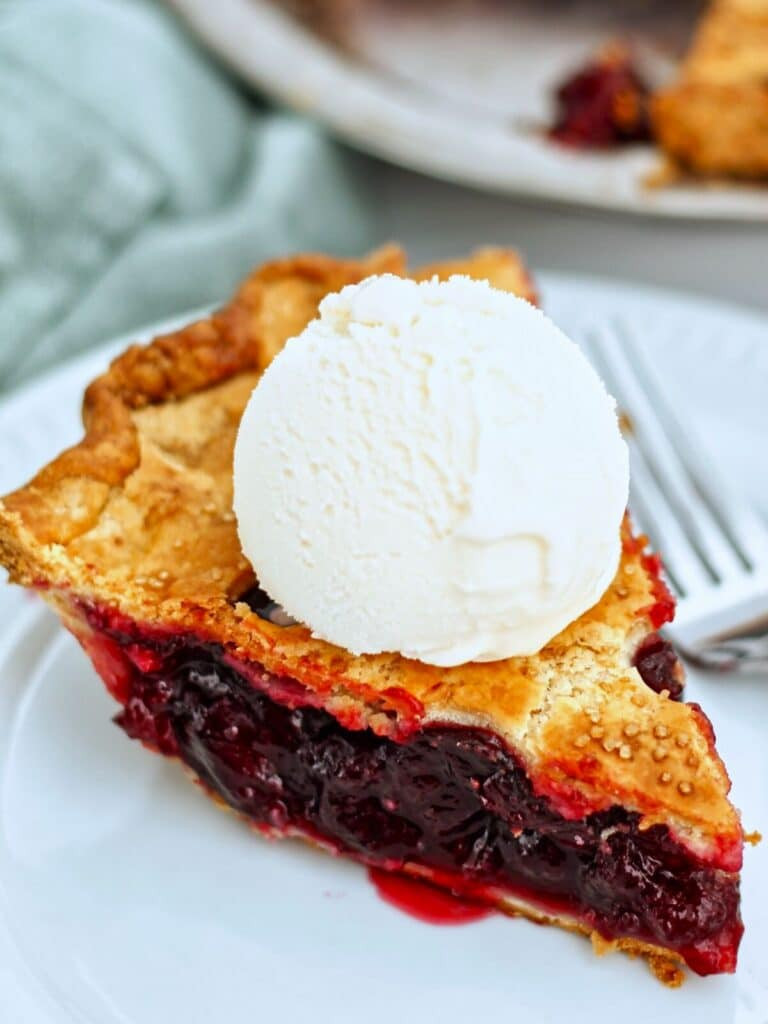
Every time the words “cherry pie” are mentioned, chances are your mind might wander to that iconic “Cherry Pie” song. Whether you’re a fan of the tune or not, the song itself is undeniably catchy and brings to mind a certain sweetness and classic Americana feel. Inspired by that very idea of a perfect “cherry pie,” we’re diving into a recipe that’s just as unforgettable: the Best Ever Gluten-Free Sweet Cherry Pie. This pie is bursting with juicy, dark sweet cherries, all nestled in a flaky, buttery, gluten-free crust. It’s not just delicious; it’s a showstopper.
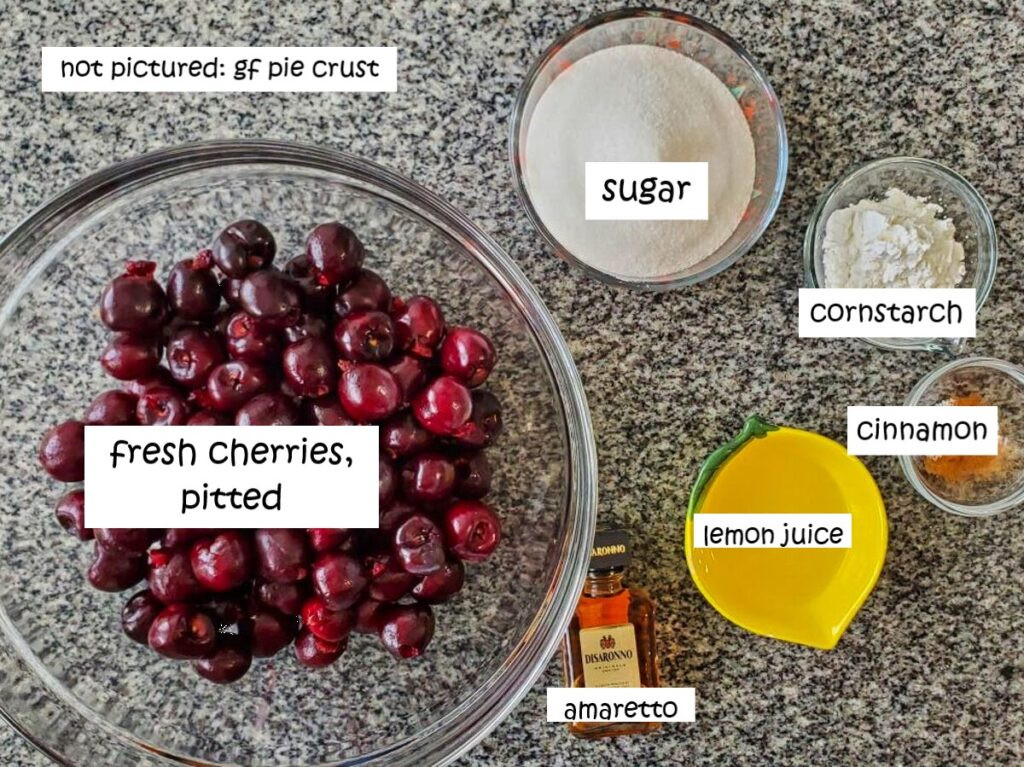 ingredients measured out and labeled on granite countertop.
You might be thinking, “Another cherry pie recipe?” But trust me, this one’s different. I wasn’t always a huge cherry pie person myself, until I tasted this cherry pie. The secret? The cherry filling is cooked on the stovetop before baking, ensuring it’s perfectly thick and doesn’t run all over when you slice into it. Honestly, the filling is so good, you might be tempted to eat it straight from the bowl – and I wouldn’t blame you! But baking it into this incredible gluten-free pie crust elevates it to a whole new level. The combination of the flaky crust and the sweet, vibrant cherry filling is pure summer bliss. Add a scoop of vanilla ice cream, and you’ve got dessert perfection that even Warrant would sing about (maybe!).
What Goes into This Gluten-Free Sweet Cherry Pie?
Here’s what makes this gluten-free cherry pie recipe so special:
-
Gluten-Free Pie Crust: The foundation of any great pie is the crust, and this gluten-free pie crust is truly exceptional. It rolls out beautifully and bakes to a golden, flaky perfection that rivals any traditional pie crust. Even if you aren’t gluten-free, you’ll be amazed. Of course, if gluten isn’t a concern, feel free to use your favorite pie crust recipe or even a store-bought crust in a pinch.
-
Sweet Cherries: For this recipe, dark sweet cherries are the star. If you happen to have access to sour cherries, you can use them, but you’ll need to adjust the sugar in the filling to balance the tartness.
-
Amaretto Liqueur: This is the secret ingredient that takes this cherry pie from good to amazing. Amaretto, with its almond flavor, beautifully complements the sweetness of the cherries. It adds a layer of sophisticated flavor that you won’t find in your average cherry pie. If you prefer to skip the amaretto, you can substitute cold water and add ½ teaspoon of almond extract to the cherry pie filling at the end of cooking for a similar, though slightly less complex, flavor.
Tips for Pitting Cherries Like a Pro
Pitting cherries can be a bit of a task, but it’s essential for a smooth cherry pie filling experience. For years, I used a single cherry pitter, and while effective, it was messy! Cherry juice everywhere! That’s why I upgraded to a multi-cherry pitter tool, and it’s been a game-changer. This tool pits multiple cherries at once and, most importantly, contains the cherry juice, minimizing mess.
While cherry pitters are helpful, remember that cherries are natural products, and sometimes a pit might sneak through. It’s always a good idea to quickly check each cherry after pitting by gently squeezing it. If you feel a pit, you can easily pop it out.
Let’s Bake: Making Your Fabulous Cherry Pie
Follow these simple steps to create your own show-stopping gluten-free sweet cherry pie:
-
In a medium saucepan, combine your pitted fresh sweet cherries with sugar, cinnamon, and lemon juice.
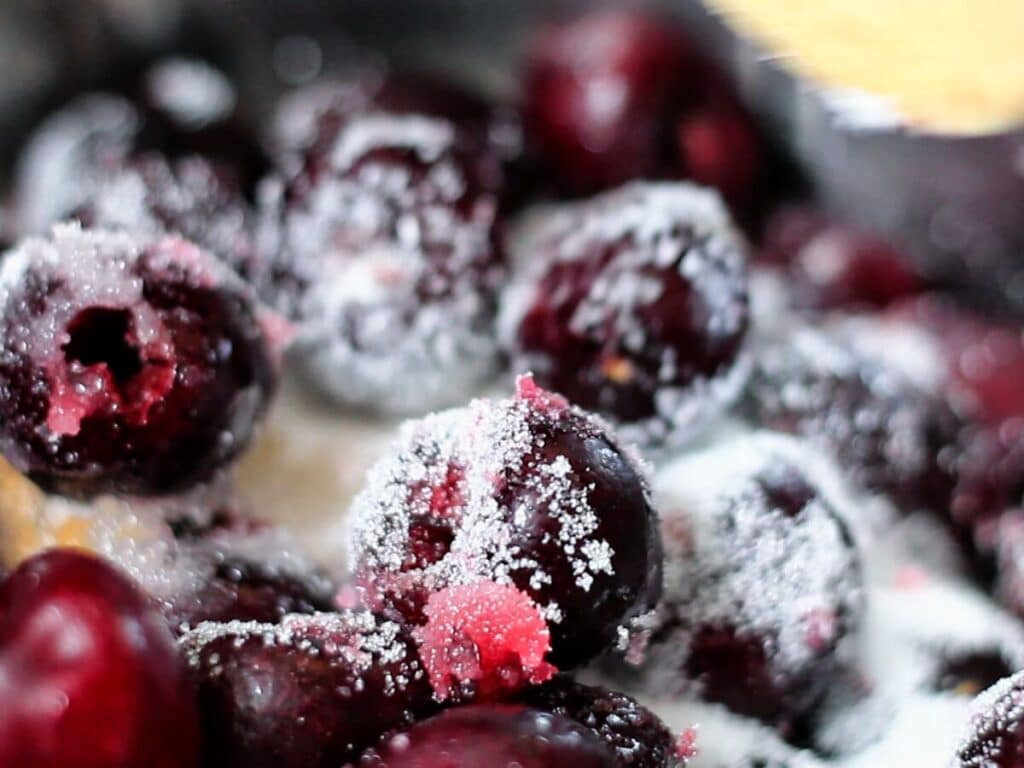 adding sugar to cherries in saucepan.
 -
Cook over medium heat, stirring occasionally, for 10-15 minutes. You’ll notice the sugar melting and the cherries releasing their delicious juices as the mixture comes to a boil.
-
In a small bowl, whisk together cornstarch and amaretto (or cold water substitute) until smooth. This cornstarch slurry is what will thicken our filling perfectly. Pour this mixture into the saucepan with the cherries, stirring constantly. Continue to boil for one minute, still stirring, until the cherry filling thickens noticeably.
-
Pour the thickened cherry filling into a bowl, cover it, and refrigerate for 2-3 hours, or until it’s thoroughly chilled. Cooling the filling is crucial for preventing a soggy bottom crust.
-
Once the filling is chilled, line your pie dish with the bottom pie crust.
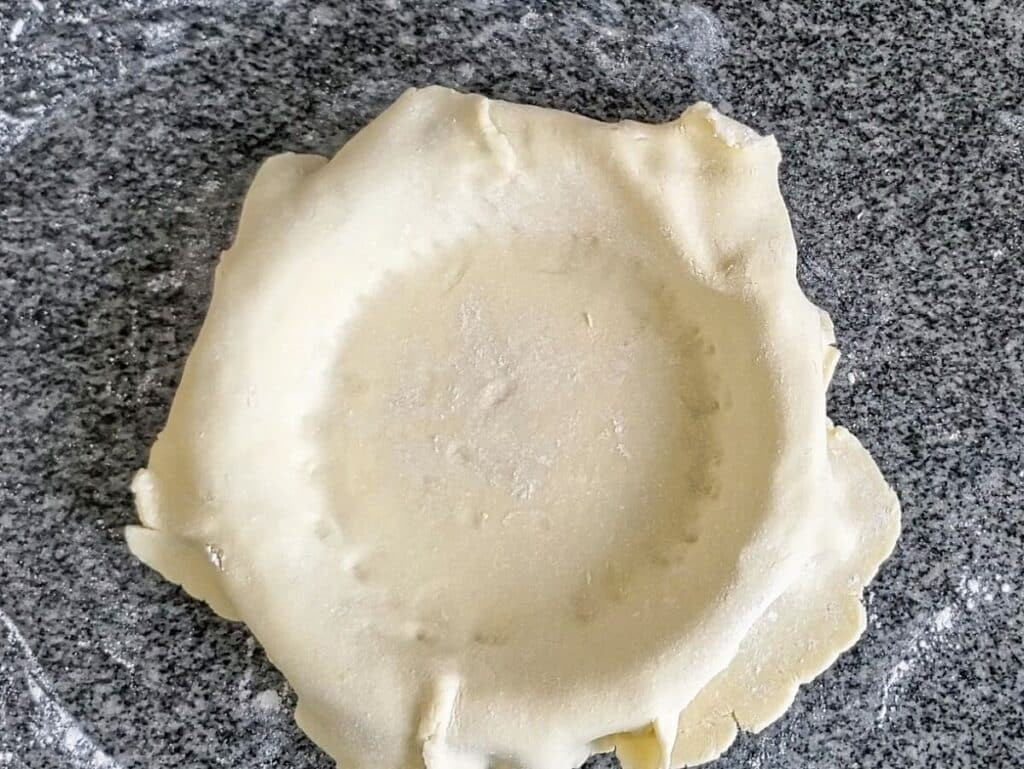 bottom pie crust in pie plate.
 -
Pour the cooled cherry pie filling into the prepared pie crust, spreading it evenly.
-
Carefully place the top pie crust over the cherries. Crimp the edges to seal the top and bottom crusts together. Cut vents or decorative slits in the top crust to allow steam to escape during baking.
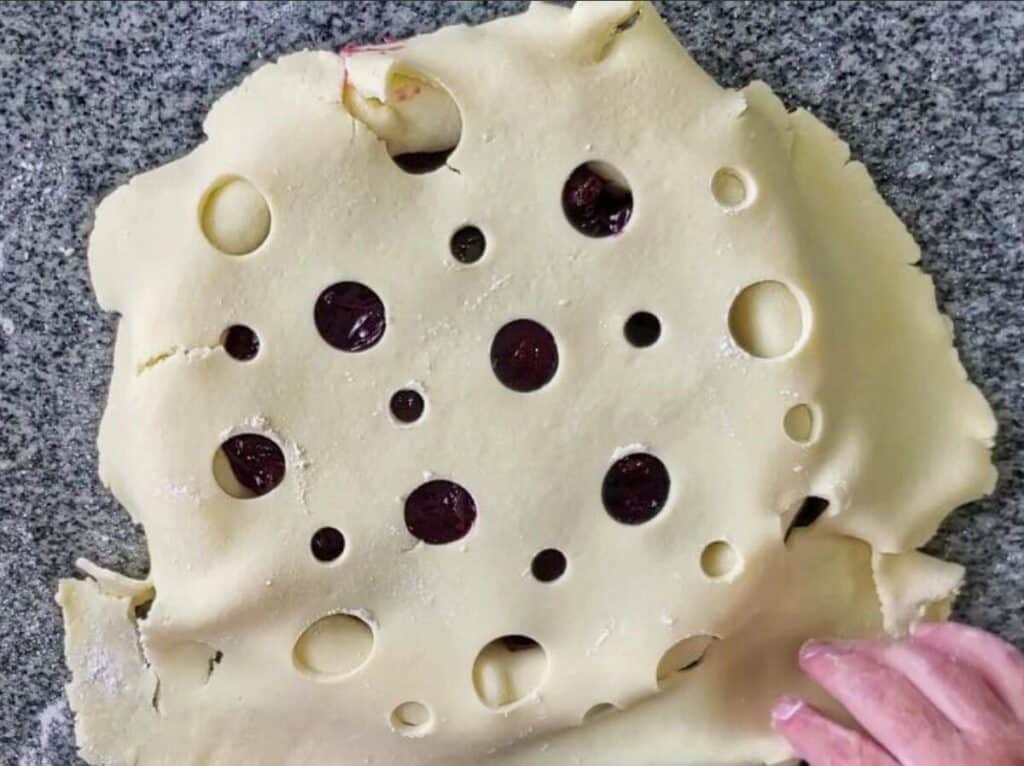 putting top crust on top of cherry pie.
 -
Brush the top crust with an egg wash (egg mixed with a tablespoon of water) and sprinkle with turbinado sugar for a beautiful golden sheen and added crunch.
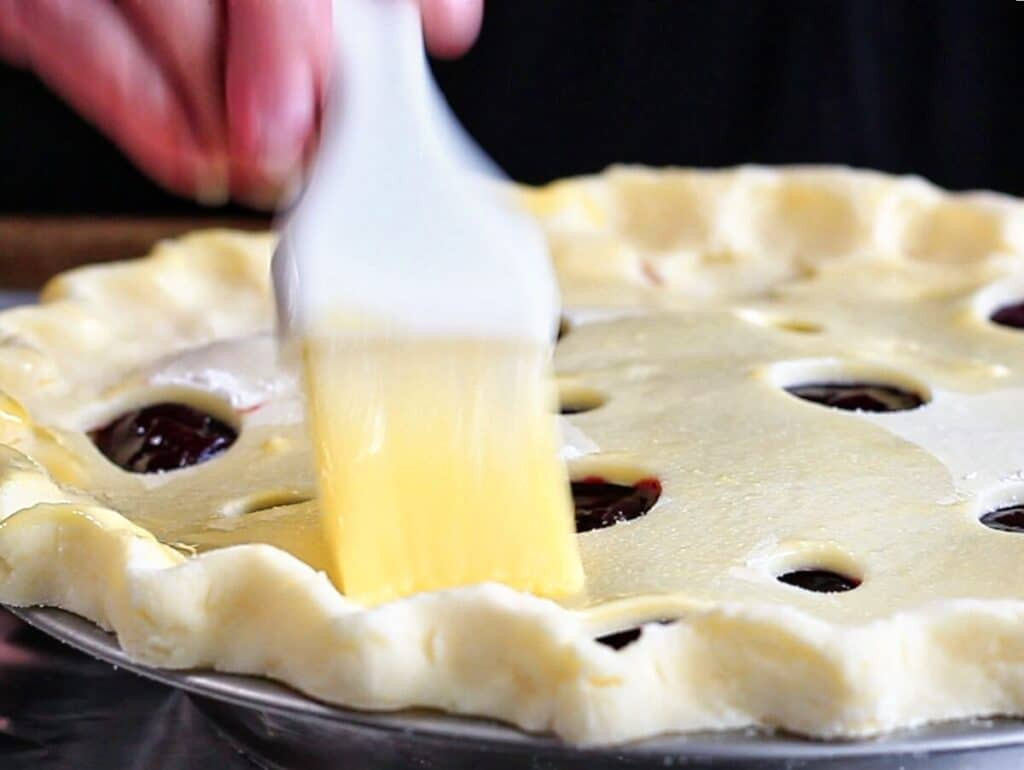 brushing top pie crust with egg wash.
 -
Bake in a preheated oven at 400°F (200°C) for 15 minutes. Then, reduce the temperature to 350°F (175°C), cover the crust edges with foil or a pie crust shield to prevent over-browning, and continue to bake for another 45-50 minutes. The pie is done when the filling is bubbling hot and the crust is golden brown.
-
Let the cherry pie cool completely on a wire rack before slicing and serving. Patience is key! This allows the filling to set up perfectly, giving you those clean, beautiful slices.
Gluten Free Cherry Pie: Your Questions Answered
Do I need to prebake the bottom crust?
No pre-baking is needed for this recipe. Because the cherry filling is cooked beforehand, the bottom crust will bake perfectly along with the rest of the pie.
What’s the best thickener for cherry pie filling?
Cornstarch is my go-to thickener for cherry pie. It provides a lovely, clear finish. However, tapioca starch or arrowroot starch are also excellent gluten-free alternatives.
How do I prevent my cherry pie filling from being runny?
The secret is in cooking the cherry filling on the stovetop first! This crucial step ensures that the juices thicken properly before they even go into the pie, guaranteeing a perfectly set filling.
Can I use frozen cherries instead of fresh cherries?
Absolutely! Frozen dark sweet cherries work wonderfully in this recipe. There’s no need to thaw them; simply use them straight from frozen when making the filling.
Craving More Gluten-Free Fruit Pies?
 gluten free mixed berry pie
If you’re now a cherry pie convert (or were already a fan!), and looking for more gluten-free pie inspiration, you’re in the right place! Explore other delicious fruit pie recipes and enjoy the world of gluten-free baking.
Best Ever Gluten Free Sweet Cherry Pie Recipe
By Kim – Bursting with dark sweet cherries and surrounded by a flaky and buttery crust, this Gluten Free Sweet Cherry Pie is as delicious as it is gorgeous!
Print Recipe Pin Recipe
Prep Time: 45 minutes
Cook Time: 1 hour
Total Time: 1 hour 45 minutes
Course: Dessert
Cuisine: American
Servings: 8 slices
Equipment
- Pie dish
- Saucepan
- Mixing bowls
Ingredients
- 4 cups (approx 800g) fresh or frozen sweet cherries, pitted (no need to thaw if using frozen)
- 1 cup (200g) granulated sugar
- 2 tbsp (30g) lemon juice
- ⅛ teaspoon cinnamon (optional)
- ¼ cup (30g) cornstarch (tapioca starch or arrowroot may be substituted)
- 1 mini bottle (50ml) Amaretto di Saronno (cold water may be substituted)
- 1 recipe gluten free pie crusts (chilled)
- 1 large egg mixed with 1 tablespoon water and a pinch of salt, for egg wash
[Get Recipe Ingredients]
Instructions
Make the Filling
- In a medium saucepan over medium heat, combine the fresh (or frozen) cherries, sugar, cinnamon, and lemon juice. Stir occasionally and allow the sugar to melt and the cherry juices to release.
- Bring the mixture to a boil and reduce the heat to medium low. Boil for 8-10 minutes, or until the mixture is quite syrupy.
- Whisk together the cornstarch and Amaretto (or water) until smooth. While stirring constantly, add the cornstarch slurry to the cherries and continue stirring for one minute, until mixture has thickened considerably.
- Remove from the heat, pour into a bowl, cover, and refrigerate for at least two hours.
Assemble the Pie
- Preheat oven to 400° F (200°C).
- Roll out the bottom crust to fit an 8-inch pie pan (see notes below for larger pie pans).
- Pour chilled filling into crust and level the top.
- Roll out top crust a few inches larger than pie pan. Cut out holes using large round pastry tip (if desired) or leave solid. Carefully transfer crust to top of pie and trim edges to fit pan. Fold excess bottom crust up and over top crust and crimp edges to seal.
- Cut out slits in top of pie (if you didn’t cut out holes), brush with egg wash, and sprinkle with turbinado sugar or sparkling sugar. Place on parchment or foil-lined rimmed baking sheet to catch any drips.
Bake Pie
- Bake pie at 400° F (200°C) for 15 minutes. Reduce temperature to 350° F (175°C) and shield edges with pie crust shield or foil, and bake for another 45-50 minutes, or until cherry filling is bubbling.
- Remove from oven and allow to cool completely before serving.
Notes
Pie can be kept at room temperature, covered, for up to 4 days. It can also be frozen in slices or whole, for up to 3 months.
Keyword: Gluten Free, sweet cherry pie
Tried this recipe? Tag @letthemeatglutenfreecake on Instagram so we can see!