Do you want to enjoy your favorite tunes offline on your iPhone? Downloading songs from iTunes to your iPhone is a straightforward process that allows you to listen to your music anytime, anywhere, without needing an internet connection. At payoffsong.com, we’re here to guide you through every step, ensuring you get the most out of your music library. We’ll also explore how to license your music and potentially increase your earning, covering critical aspects like royalty collection and music monetization.
1. What Are The Steps To Download Music From iTunes To My iPhone?
Downloading music from iTunes to your iPhone involves a few simple steps: first, ensure you’re signed in to iTunes with the same Apple ID you use on your iPhone, then enable iCloud Music Library. Next, purchase or add the desired music to your iTunes library. Finally, download the songs to your iPhone either through iTunes or directly via the Music app.
Detailed Steps:
-
Sign in to iTunes: Open iTunes on your computer and sign in with your Apple ID. This should be the same Apple ID you use on your iPhone to ensure seamless synchronization.
-
Enable iCloud Music Library:
- Go to “Edit” > “Preferences” (Windows) or “iTunes” > “Preferences” (Mac).
- In the “General” tab, check the box next to “iCloud Music Library.” This allows your music library to be synced across all your devices.
-
Add Music to Your iTunes Library:
- Purchase Music: You can buy songs or albums directly from the iTunes Store. Once purchased, the music is automatically added to your library.
- Import Music: If you have music files on your computer (e.g., MP3 files), you can import them into iTunes by going to “File” > “Add File to Library” or “Add Folder to Library.”
-
Download Music to Your iPhone via iTunes:
- Connect your iPhone to your computer using a USB cable.
- Select your iPhone when it appears in iTunes.
- Go to “Music” in the sidebar.
- Choose “Sync Music.” You can select to sync your entire music library or specific playlists, artists, or albums.
- Click “Apply” to start the syncing process.
-
Download Music Directly to Your iPhone via the Music App:
- Open the Music app on your iPhone.
- Find the song, album, or playlist you want to download.
- Tap the cloud icon with a downward arrow next to the song or album. This will download the music to your device for offline listening.
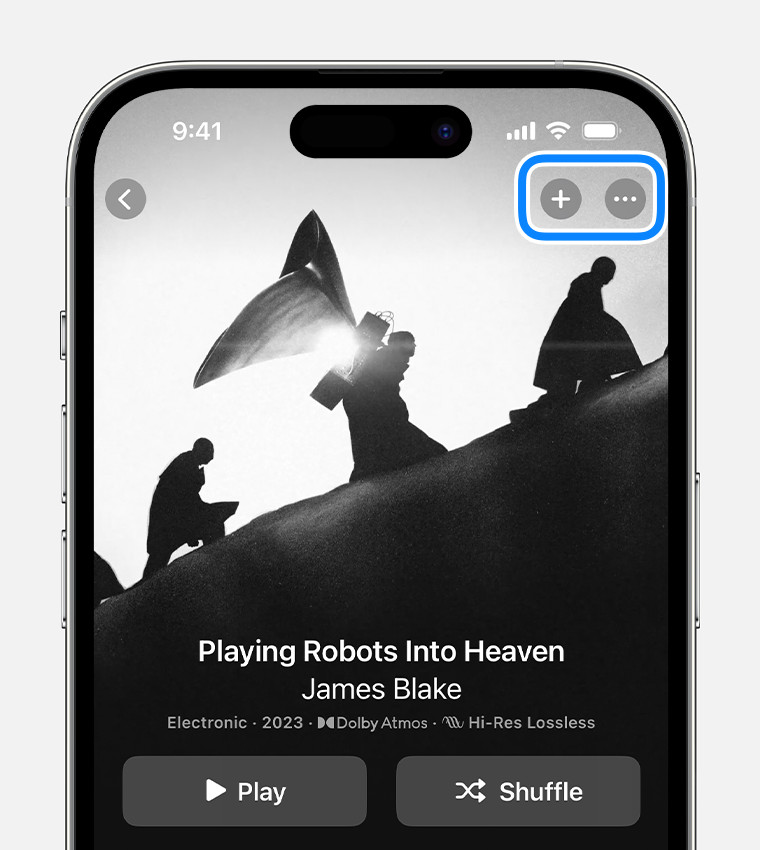 iPhone displaying the Apple Music app with the add to library option.
By following these steps, you can easily download music from iTunes to your iPhone and enjoy your favorite songs offline.
2. How Do I Ensure That The Songs I Download Are High Quality?
To ensure high-quality downloads, adjust your iTunes settings to prioritize higher bitrates. Go to “Edit” > “Preferences” > “Playback” and select “High Quality Streaming.” Also, in “Import Settings,” choose a higher encoding like AAC at 256 kbps or Apple Lossless.
Step-by-Step Guide:
-
Open iTunes Preferences:
- On Windows: Go to “Edit” > “Preferences.”
- On Mac: Go to “iTunes” > “Preferences.”
-
Adjust Playback Settings:
- In the “General” tab, click on “Playback.”
- Look for the “Streaming Quality” option.
- Select “High Quality” to ensure that streamed music is of the highest possible quality.
-
Configure Import Settings:
- In the “General” tab, click on “Import Settings.”
- In the “Import Using” dropdown menu, choose “AAC Encoder” or “Apple Lossless Encoder.” AAC is a good balance between file size and quality, while Apple Lossless provides the highest quality but results in larger files.
- In the “Setting” dropdown menu, choose “High Quality (256 kbps)” for AAC or “Lossless” for Apple Lossless.
- Click “OK” to save the settings.
-
Download Music:
- When you download music from the iTunes Store or import songs from CDs, iTunes will now use these settings to ensure the highest possible quality.
- For existing songs in your library, you may need to re-import them with the new settings to improve their quality.
Additional Tips:
-
Check Source Quality: If you’re importing music from CDs or other sources, ensure that the original files are of high quality. A low-quality source file will not improve, even with high import settings.
-
Storage Space: Keep in mind that higher quality music files will take up more storage space on your iPhone. Ensure you have enough available storage to accommodate your music library.
-
Apple Music Settings: If you’re an Apple Music subscriber, you can also adjust the download quality settings within the Music app on your iPhone:
- Go to “Settings” > “Music.”
- Under “Downloads,” you can enable “High Quality” for cellular and Wi-Fi downloads.
By following these steps, you can optimize your iTunes settings to ensure that the songs you download to your iPhone are of the highest possible quality, providing you with the best listening experience.
3. What If My Downloaded Songs Are Not Showing Up On My iPhone?
If your downloaded songs aren’t showing up on your iPhone, first ensure iCloud Music Library is enabled on both your computer and iPhone. Then, check that your iPhone is connected to the internet and that you’ve synced your music library correctly in iTunes. Restarting both devices can also help resolve the issue.
Troubleshooting Steps:
-
Verify iCloud Music Library Settings:
- On your Computer:
- Open iTunes.
- Go to “Edit” > “Preferences” (Windows) or “iTunes” > “Preferences” (Mac).
- In the “General” tab, ensure “iCloud Music Library” is checked.
- On your iPhone:
- Go to “Settings” > “Music.”
- Ensure “Sync Library” is enabled.
- On your Computer:
-
Check Internet Connection:
- Ensure that your iPhone is connected to a stable Wi-Fi or cellular data network. A poor internet connection can prevent songs from syncing properly.
-
Sync Your Music Library:
- Via iTunes:
- Connect your iPhone to your computer using a USB cable.
- Open iTunes and select your iPhone.
- Go to “Music” in the sidebar.
- Ensure “Sync Music” is checked and select whether to sync your entire library or specific playlists.
- Click “Apply” to start the syncing process.
- Via Wi-Fi Sync (if enabled):
- Ensure both your computer and iPhone are on the same Wi-Fi network.
- In iTunes, select your iPhone and go to “Summary.”
- Check “Sync with this iPhone over Wi-Fi.”
- Click “Apply.”
- Via iTunes:
-
Restart Your Devices:
- Sometimes, a simple restart can resolve syncing issues.
- Restart your iPhone and your computer.
-
Check Available Storage:
- Ensure your iPhone has enough available storage for the downloaded songs.
- Go to “Settings” > “General” > “iPhone Storage” to check your storage usage.
- If your storage is full, you may need to delete some files or apps to make room for the music.
-
Update Software:
- Ensure that both your iPhone and computer are running the latest versions of their respective operating systems.
- Update iOS on your iPhone by going to “Settings” > “General” > “Software Update.”
- Update iTunes to the latest version.
-
Sign Out and Back In:
- Sign out of your Apple ID on both your iPhone and computer, then sign back in.
- On your iPhone:
- Go to “Settings” > “Your Name” > “Sign Out.”
- Sign back in with your Apple ID.
- On your Computer:
- In iTunes, go to “Account” > “Sign Out.”
- Sign back in with your Apple ID.
-
Check for Hidden Purchases:
- Sometimes, purchased songs may be hidden.
- In iTunes, go to “Account” > “View My Account.”
- Scroll down to “iTunes in the Cloud” and click “Manage” next to “Hidden Purchases.”
- If any songs are hidden, unhide them.
By following these troubleshooting steps, you should be able to resolve the issue of downloaded songs not showing up on your iPhone.
4. Can I Download Music To My iPhone Without Using iTunes?
Yes, you can download music to your iPhone without using iTunes by using Apple Music, third-party apps, or cloud services like Google Play Music or Amazon Music. These options allow you to sync and download music directly to your iPhone.
Methods to Download Music Without iTunes:
-
Apple Music:
- Subscription Service: Apple Music is a subscription-based service that allows you to stream and download music directly to your iPhone.
- How to Use:
- Subscribe to Apple Music.
- Open the Music app on your iPhone.
- Find the song, album, or playlist you want to download.
- Tap the cloud icon with a downward arrow to download the music for offline listening.
-
Third-Party Apps:
- Example Apps: There are several third-party apps available on the App Store that allow you to download and manage music, such as Documents by Readdle, Evermusic, and others.
- How to Use:
- Download and install a reputable third-party music app from the App Store.
- Follow the app’s instructions to import or download music files. This may involve transferring files from your computer or downloading directly from supported sources.
-
Cloud Services:
- Google Play Music (YouTube Music):
- Upload Music: You can upload your music library to Google Play Music (now replaced by YouTube Music) and then download it to your iPhone.
- How to Use:
- Upload your music to YouTube Music using the YouTube Music web interface.
- Download the YouTube Music app on your iPhone.
- Sign in with your Google account.
- Find the uploaded music and download it for offline listening.
- Amazon Music:
- Upload Music: If you have an Amazon Prime or Amazon Music Unlimited subscription, you can upload your music library to Amazon Music and download it to your iPhone.
- How to Use:
- Upload your music to Amazon Music using the Amazon Music desktop app or web interface.
- Download the Amazon Music app on your iPhone.
- Sign in with your Amazon account.
- Find the uploaded music and download it for offline listening.
- Dropbox, Google Drive, OneDrive:
- Store and Play: You can store your music files in cloud storage services like Dropbox, Google Drive, or OneDrive and use a music player app that supports cloud playback.
- How to Use:
- Upload your music files to your preferred cloud storage service.
- Download a music player app on your iPhone that supports cloud playback (e.g., VOX, CloudBeats).
- Connect the app to your cloud storage account.
- Stream or download the music files for offline listening.
- Google Play Music (YouTube Music):
-
Direct Download via Browser:
- Download Music: Some websites offer direct downloads of music files.
- How to Use:
- Use a browser on your iPhone to visit a website offering music downloads.
- Download the music files to your iPhone.
- Use a file manager app (like Documents by Readdle) to manage and play the downloaded music files.
Considerations:
- Copyright and Legal Issues: Ensure that you have the legal right to download and listen to the music. Downloading copyrighted music without permission is illegal.
- App Permissions: Be cautious when granting permissions to third-party apps. Only download apps from reputable sources and review their privacy policies.
- Storage Space: Downloading music to your iPhone will use storage space. Ensure you have enough available storage.
By using these alternative methods, you can enjoy your favorite music on your iPhone without relying on iTunes.
5. How Do I Manage My Music Library On My iPhone After Downloading?
Managing your music library on your iPhone after downloading involves organizing playlists, deleting songs, and adjusting settings within the Music app to personalize your listening experience. Regular maintenance ensures your library remains organized and efficient.
Steps to Manage Your Music Library:
-
Organize Playlists:
- Create New Playlists:
- Open the Music app on your iPhone.
- Go to the “Library” tab and tap “Playlists.”
- Tap “New Playlist.”
- Give your playlist a name and add songs by tapping the “+” icon next to each song.
- Tap “Done” to save your playlist.
- Edit Existing Playlists:
- Go to the “Library” tab and tap “Playlists.”
- Select the playlist you want to edit.
- Tap the “Edit” button.
- Add or remove songs by tapping the “+” or “-” icons.
- Reorder songs by dragging them up or down.
- Tap “Done” to save your changes.
- Create New Playlists:
-
Delete Songs:
- Remove Downloaded Songs:
- Open the Music app on your iPhone.
- Find the song you want to delete.
- Tap and hold on the song.
- Select “Remove.”
- Choose “Remove Download” to delete the song from your device but keep it in your iCloud Music Library, or “Delete from Library” to remove it entirely.
- Delete Songs from Library:
- Open the Music app on your iPhone.
- Go to the “Library” tab and find the song you want to delete.
- Tap and hold on the song.
- Select “Delete from Library.”
- Confirm that you want to delete the song from your iCloud Music Library.
- Remove Downloaded Songs:
-
Adjust Music App Settings:
- Access Settings:
- Open the “Settings” app on your iPhone.
- Scroll down and tap “Music.”
- Customize Settings:
- Sync Library: Ensure “Sync Library” is enabled to keep your music library synced across all your devices.
- Cellular Data: Adjust settings for streaming and downloading over cellular data to avoid excessive data usage.
- Download in Dolby Atmos: Enable or disable Dolby Atmos downloads for enhanced audio quality (if available).
- Audio Quality: Set the audio quality for streaming and downloads to optimize sound quality based on your preferences and available storage.
- Automatic Downloads: Enable automatic downloads for newly added music to your library.
- Access Settings:
-
Use Smart Playlists (on Computer):
- Create Smart Playlists in iTunes/Music App (on Computer):
- Open iTunes or the Music app on your computer.
- Go to “File” > “New” > “Smart Playlist.”
- Set rules for the playlist based on criteria such as genre, artist, date added, etc.
- The playlist will automatically update as you add or remove music that matches the criteria.
- Sync Smart Playlists to iPhone:
- Connect your iPhone to your computer and sync your music library.
- The smart playlists will appear in the Music app on your iPhone.
- Create Smart Playlists in iTunes/Music App (on Computer):
-
Use “Love” and “Suggest Less Like This” Features:
- “Love” Songs:
- In the Music app, tap the heart icon next to a song to “Love” it. This helps Apple Music learn your preferences and recommend similar music.
- “Suggest Less Like This”:
- If you don’t like a song, tap and hold on it, then select “Suggest Less Like This.” This tells Apple Music to avoid recommending similar songs in the future.
- “Love” Songs:
-
Regularly Update Your Library:
- Delete Unwanted Music: Regularly review your music library and delete songs you no longer enjoy to free up storage space and keep your library organized.
- Update Metadata: Ensure that your music files have accurate metadata (e.g., artist, album, song title, artwork) for better organization and identification. You can edit metadata in iTunes or the Music app on your computer.
By following these steps, you can effectively manage your music library on your iPhone, keeping it organized, personalized, and optimized for your listening preferences.
6. What Are The Copyright Implications Of Downloading Music?
Downloading music without proper authorization can lead to copyright infringement, potentially resulting in legal consequences such as fines or lawsuits. It’s essential to download music from legitimate sources like iTunes or streaming services with appropriate licenses.
Understanding Copyright Implications:
-
Copyright Law:
- Protection of Creative Works: Copyright law protects the rights of creators of original works, including musicians, songwriters, and record labels.
- Exclusive Rights: Copyright owners have exclusive rights to reproduce, distribute, perform, and display their works.
-
Downloading Music:
- Legal Sources: Downloading music from authorized sources like the iTunes Store, Apple Music, Spotify, Amazon Music, and other legitimate platforms is generally legal because these services have obtained the necessary licenses from copyright holders.
- Illegal Sources: Downloading music from unauthorized sources, such as torrent sites, illegal download sites, or file-sharing networks, is copyright infringement.
-
Consequences of Copyright Infringement:
- Civil Lawsuits: Copyright owners can sue infringers for monetary damages. Damages can include actual damages (the copyright owner’s lost profits) and statutory damages (a set amount per infringement, regardless of actual losses).
- Criminal Charges: In some cases, copyright infringement can lead to criminal charges, especially for large-scale or commercial infringement.
- DMCA (Digital Millennium Copyright Act): The DMCA in the United States provides a framework for addressing copyright infringement online, including safe harbor provisions for online service providers and mechanisms for copyright owners to request the removal of infringing content.
-
Fair Use and Exceptions:
- Limited Exceptions: Copyright law includes some exceptions, such as fair use, which allows limited use of copyrighted material for purposes like criticism, commentary, news reporting, teaching, scholarship, or research.
- Not a Free Pass: Fair use is a complex legal doctrine, and whether a particular use qualifies as fair use depends on a fact-specific analysis considering factors like the purpose and character of the use, the nature of the copyrighted work, the amount and substantiality of the portion used, and the effect of the use on the market for the copyrighted work.
-
Best Practices for Downloading Music:
- Use Authorized Services: Stick to downloading music from reputable and authorized services like iTunes, Apple Music, Spotify, Amazon Music, etc.
- Read Terms of Service: Understand the terms of service of any music service you use, including what rights you have to the music you download and any restrictions on its use.
- Respect Copyright: Respect the rights of copyright owners by not distributing or sharing unauthorized copies of music.
- Support Artists: Support musicians and songwriters by purchasing their music legally or subscribing to streaming services that pay royalties to artists.
-
Licensing:
- Understand Licenses: If you want to use music in a commercial project (e.g., a video, advertisement, or film), you typically need to obtain a license from the copyright owner.
- Types of Licenses: Common types of music licenses include synchronization licenses (for using music in visual media), mechanical licenses (for reproducing music), and public performance licenses (for playing music in public).
By understanding the copyright implications of downloading music and following best practices, you can enjoy your favorite tunes legally and ethically while respecting the rights of music creators.
7. How Do I Transfer Music From My Computer To My iPhone?
To transfer music from your computer to your iPhone, you can use iTunes or Finder (on macOS Catalina or later) to sync your music library. Alternatively, cloud services like Apple Music, Google Play Music, or Amazon Music offer wireless transfer options.
Methods to Transfer Music from Computer to iPhone:
-
Using iTunes (for Windows or macOS Mojave and Earlier):
- Connect iPhone to Computer: Connect your iPhone to your computer using a USB cable.
- Open iTunes: Open the iTunes application on your computer.
- Select Your iPhone: Click on the iPhone icon that appears in the top left corner of the iTunes window.
- Go to Music: In the sidebar, under “Settings,” click on “Music.”
- Sync Music:
- Check the box next to “Sync Music.”
- Choose to sync your entire music library or selected playlists, artists, albums, and genres.
- If you choose selected items, make sure to check the boxes next to the music you want to transfer.
- Apply Changes: Click the “Apply” button in the bottom right corner to start the syncing process.
- Wait for Sync: Wait for iTunes to finish syncing the music to your iPhone.
-
Using Finder (for macOS Catalina and Later):
- Connect iPhone to Computer: Connect your iPhone to your computer using a USB cable.
- Open Finder: Open a new Finder window on your Mac.
- Select Your iPhone: Your iPhone should appear in the sidebar under “Locations.” Click on it.
- Trust This Computer: If prompted on your iPhone, tap “Trust” to allow the computer to access your device.
- Go to Music: Click on the “Music” tab in the Finder window.
- Sync Music:
- Check the box next to “Sync music onto [Your iPhone Name].”
- Choose to sync your entire music library or selected artists, albums, genres, and playlists.
- If you choose selected items, make sure to check the boxes next to the music you want to transfer.
- Apply Changes: Click the “Apply” button in the bottom right corner to start the syncing process.
- Wait for Sync: Wait for Finder to finish syncing the music to your iPhone.
-
Using Apple Music (iCloud Music Library):
- Enable iCloud Music Library:
- On your Computer: Open iTunes or the Music app, go to “Preferences,” and enable “iCloud Music Library.”
- On your iPhone: Go to “Settings” > “Music” and enable “Sync Library.”
- Upload Music to iCloud:
- Make sure your music is added to your iTunes/Music library on your computer.
- iTunes/Music app will automatically upload your music to iCloud Music Library.
- Download on iPhone:
- Open the Music app on your iPhone.
- Find the music you want to download and tap the cloud icon to download it for offline listening.
- Enable iCloud Music Library:
-
Using Cloud Services (Google Play Music/YouTube Music, Amazon Music):
- Upload Music to Cloud Service:
- Google Play Music/YouTube Music: Upload your music to YouTube Music using the YouTube Music web interface or the Google Play Music Manager.
- Amazon Music: Upload your music to Amazon Music using the Amazon Music desktop app or web interface.
- Download Music on iPhone:
- Google Play Music/YouTube Music: Download the YouTube Music app on your iPhone, sign in with your Google account, and download the music for offline listening.
- Amazon Music: Download the Amazon Music app on your iPhone, sign in with your Amazon account, and download the music for offline listening.
- Upload Music to Cloud Service:
-
Using Third-Party Apps:
- Install App: Download and install a third-party file management app like Documents by Readdle.
- Transfer Music Files:
- Transfer the music files from your computer to your iPhone using the app’s file transfer features (e.g., Wi-Fi transfer, cloud service integration).
- Play Music:
- Use the app to play the transferred music files.
Tips and Considerations:
- Backup Your Music: Before transferring music, ensure you have a backup of your music library in case anything goes wrong during the transfer process.
- Check Storage Space: Make sure your iPhone has enough available storage space to accommodate the music you want to transfer.
- Keep Software Updated: Ensure that iTunes or Finder and your iPhone’s operating system are up to date for the best compatibility and performance.
- Troubleshooting: If you encounter issues during the transfer process, try restarting both your computer and iPhone, and ensure that you have the latest versions of the necessary software.
By using these methods, you can easily transfer music from your computer to your iPhone and enjoy your favorite tunes on the go.
8. How Do I Fix Common iTunes Syncing Problems?
Common iTunes syncing problems can often be fixed by updating iTunes, ensuring proper USB connections, verifying iCloud Music Library settings, and resetting sync history. Addressing these issues ensures smooth music transfer and syncing between your computer and iPhone.
Troubleshooting Steps:
-
Update iTunes or Finder:
- iTunes (Windows):
- Open iTunes.
- Go to “Help” > “Check for Updates.”
- Follow the prompts to install any available updates.
- iTunes (macOS Mojave and Earlier):
- Open iTunes.
- Go to “iTunes” > “Check for Updates.”
- Follow the prompts to install any available updates.
- Finder (macOS Catalina and Later):
- Since Finder is part of the operating system, update your macOS to the latest version by going to “System Preferences” > “Software Update.”
- iTunes (Windows):
-
Check USB Connection:
- Use a Reliable Cable: Ensure you are using a high-quality USB cable to connect your iPhone to your computer.
- Try a Different USB Port: Try connecting your iPhone to a different USB port on your computer to rule out any issues with the port itself.
- Restart Devices: Restart both your computer and your iPhone to refresh the connection.
-
Verify iCloud Music Library Settings:
- On your Computer:
- Open iTunes or the Music app.
- Go to “Edit” > “Preferences” (Windows) or “iTunes” > “Preferences” (Mac).
- In the “General” tab, ensure “iCloud Music Library” is checked.
- On your iPhone:
- Go to “Settings” > “Music.”
- Ensure “Sync Library” is enabled.
- On your Computer:
-
Authorize Your Computer:
- Open iTunes: Open iTunes on your computer.
- Authorize Computer: Go to “Account” > “Authorizations” > “Authorize This Computer.”
- Enter Apple ID: Enter your Apple ID and password to authorize the computer.
-
Reset Sync History:
- Open iTunes: Open iTunes on your computer.
- Reset Sync History: Go to “Edit” > “Preferences” (Windows) or “iTunes” > “Preferences” (Mac).
- Click on the “Advanced” tab.
- Click the “Reset Sync History” button.
- Click “OK” to confirm.
-
Check for Conflicting Software:
- Identify Conflicts: Some third-party software, such as security software or VPNs, can interfere with iTunes syncing.
- Disable Software: Temporarily disable any potentially conflicting software and try syncing again.
-
Ensure Sufficient Storage Space:
- Check iPhone Storage:
- Go to “Settings” > “General” > “iPhone Storage” to check available storage space on your iPhone.
- Check Computer Storage:
- Ensure your computer has enough free space for the syncing process.
- Check iPhone Storage:
-
Reinstall iTunes:
- Uninstall iTunes: Uninstall iTunes from your computer.
- Download Latest Version: Download the latest version of iTunes from the Apple website.
- Reinstall iTunes: Reinstall iTunes and try syncing again.
-
Check Apple Mobile Device USB Driver (Windows):
- Open Device Manager:
- Press “Windows Key + X” and select “Device Manager.”
- Locate Apple Mobile Device USB Driver:
- Expand “Universal Serial Bus controllers.”
- Look for “Apple Mobile Device USB Driver.”
- Update or Reinstall Driver:
- If the driver is listed with an error (yellow exclamation mark), right-click on it and select “Update driver.”
- If updating doesn’t work, uninstall the driver, disconnect your iPhone, restart your computer, and then reconnect your iPhone to reinstall the driver automatically.
- Open Device Manager:
-
Disable Wi-Fi Sync and Use USB Sync:
- Open iTunes: Open iTunes on your computer.
- Select Your iPhone: Click on the iPhone icon.
- Disable Wi-Fi Sync: In the “Summary” tab, uncheck “Sync with this iPhone over Wi-Fi.”
- Sync via USB: Sync your iPhone using the USB cable.
By following these troubleshooting steps, you can resolve many common iTunes syncing problems and ensure your music library stays up-to-date on your iPhone.
9. Can I Use A Different Apple ID For iTunes And My iPhone?
While it’s technically possible to use different Apple IDs for iTunes and your iPhone, it’s generally not recommended because it can complicate syncing and managing your content. Using the same Apple ID ensures seamless integration across all your Apple devices and services.
Considerations for Using Different Apple IDs:
-
Syncing Issues:
- Complexity: Using different Apple IDs can complicate the syncing of music, apps, and other content between your computer and your iPhone.
- iCloud Music Library: If you use different Apple IDs, you may encounter issues with iCloud Music Library, as it relies on a single Apple ID for syncing music across devices.
- Purchases: Purchases made with one Apple ID may not be easily accessible on a device signed in with a different Apple ID.
-
Content Management:
- Multiple Accounts: Managing content across multiple Apple IDs can be cumbersome, as you may need to switch between accounts to access different purchases and services.
- Family Sharing: Family Sharing features, which allow you to share purchases and subscriptions with family members, require all members to use the same Apple ID for purchases.
-
Recommendations:
- Same Apple ID: For the best experience and seamless integration, it is generally recommended to use the same Apple ID for iTunes and your iPhone.
- Separate Accounts for Specific Purposes: In some cases, you may want to use separate Apple IDs for specific purposes, such as:
- Development: If you are a developer, you may use a separate Apple ID for testing and development purposes.
- Privacy: Some users prefer to use separate Apple IDs for different services to enhance privacy.
-
How to Use Different Apple IDs (If Necessary):
- Sign In/Out: You can sign in and out of different Apple IDs on your iPhone as needed to access content purchased with those accounts.
- Go to “Settings” > “Your Name” > “Sign Out.”
- Sign in with the desired Apple ID.
- iTunes Store: You can sign in to the iTunes Store with a different Apple ID than the one used for iCloud.
- Open the App Store app.
- Scroll to the bottom and tap “Sign In.”
- Enter the Apple ID and password you want to use for purchases.
- Sign In/Out: You can sign in and out of different Apple IDs on your iPhone as needed to access content purchased with those accounts.
-
Potential Issues and Solutions:
- Music Not Syncing: If music purchased with one Apple ID is not syncing to a device signed in with a different Apple ID, ensure that you have authorized the computer for both Apple IDs.
- Open iTunes.
- Go to “Account” > “Authorizations” > “Authorize This Computer.”
- Authorize the computer for each Apple ID.
- Multiple Apple IDs on One Device:
- You can use multiple Apple IDs on one device for different services (e.g., one for iCloud, one for the App Store).
- However, managing content and syncing can be more complex.
- Music Not Syncing: If music purchased with one Apple ID is not syncing to a device signed in with a different Apple ID, ensure that you have authorized the computer for both Apple IDs.
Best Practices:
- Consistency: For most users, using the same Apple ID across all devices and services provides the most seamless and user-friendly experience.
- Understand the Trade-offs: If you choose to use different Apple IDs, understand the potential trade-offs and be prepared to manage multiple accounts and troubleshoot syncing issues.
- Family Sharing: If you want to share purchases with family members, ensure everyone is using the same Apple ID for iTunes and App Store purchases and enable Family Sharing.
By understanding the implications and following these guidelines, you can make an informed decision about whether to use different Apple IDs for iTunes and your iPhone.
10. How Do I Back Up My Music Library To Avoid Losing My Downloads?
Backing up your music library is crucial to avoid losing your downloaded songs due to device failure or accidental deletion. You can back up your music library using iCloud Music Library, external hard drives, or cloud storage services like Google Drive or Dropbox.
Methods to Back Up Your Music Library:
-
iCloud Music Library:
- Enable iCloud Music Library:
- On your Computer: Open iTunes or the Music app, go to “Preferences,” and enable “iCloud Music Library.”
- On your iPhone: Go to “Settings” > “Music” and enable “Sync Library.”
- Automatic Backup: When iCloud Music Library is enabled, your music library is automatically backed up to iCloud.
- Access from Any Device: You can access your music library from any device signed in with your Apple ID.
- Enable iCloud Music Library:
-
External Hard Drive:
- Connect External Hard Drive: Connect an external hard drive to your computer.
- Locate Music Folder:
- iTunes (Windows): By default, the iTunes music folder is located in
C:Users[Your Username]MusiciTunes. - Music App (macOS): By default, the Music app folder is located in
/Users/[Your Username]/Music/Music.
- iTunes (Windows): By default, the iTunes music folder is located in
- Copy Music Folder: Copy the entire iTunes or Music folder to your external hard drive.
- Regular Backups: Make regular backups to ensure your music library is up-to-date.
-
Cloud Storage Services (Google Drive, Dropbox, OneDrive):
- Choose a Cloud Storage Service: Select a cloud storage service like Google Drive, Dropbox, or OneDrive.
- Install the App: Install the cloud storage app on your computer.
- Copy Music Folder: Copy the iTunes or Music folder to the cloud storage folder on your computer.
- Automatic Sync: The cloud storage service will automatically sync your music library to the cloud.
-
Time Machine (macOS):
- Enable Time Machine:
- Connect an external hard drive to your Mac.
- Go to “System Preferences” > “Time Machine.”
- Select your external hard drive as the backup disk.
- Enable Time Machine to automatically back up your entire system, including your music library.
- Automatic Backups: Time Machine will automatically back up your music library along with your other files
- Enable Time Machine: