
Taking songs from iTunes to your iPhone can be a straightforward process, enabling you to enjoy your favorite music on the go, and payoffsong.com is here to guide you through it. Whether you prefer automatic syncing for convenience or manual management for greater control, understanding the steps will ensure a seamless experience. Discover how to transfer music effortlessly, manage your playlists, and make the most of your Apple devices with techniques for music licensing and royalty collection.
1. Understanding Your Syncing Options
What are the different ways to sync music from iTunes to your iPhone?
There are two primary methods to transfer music from iTunes to your iPhone: automatic syncing and manual management. Automatic syncing is quicker, allowing iTunes to automatically update your device with selected content whenever it’s connected. Manual management offers greater control, letting you drag and drop specific songs, albums, or playlists onto your iPhone. According to Apple Support, both USB and Wi-Fi connections can be used for syncing, providing flexibility based on your network availability.
1.1 Automatic Syncing: The Quick and Easy Method
Automatic syncing is the simplest way to keep your iPhone updated with your iTunes library. This method is ideal if you want your device to mirror your iTunes collection without much manual effort.
How Automatic Syncing Works
-
Connect Your Device: Use a USB cable or Wi-Fi to connect your iPhone to your computer.
-
Open iTunes: Launch the iTunes application on your PC.
-
Select Your Device: Click the Device button, usually located near the top-left corner of the iTunes window.
-
Choose Content Types: In the sidebar, select the types of content you want to sync, such as Music or TV Shows.
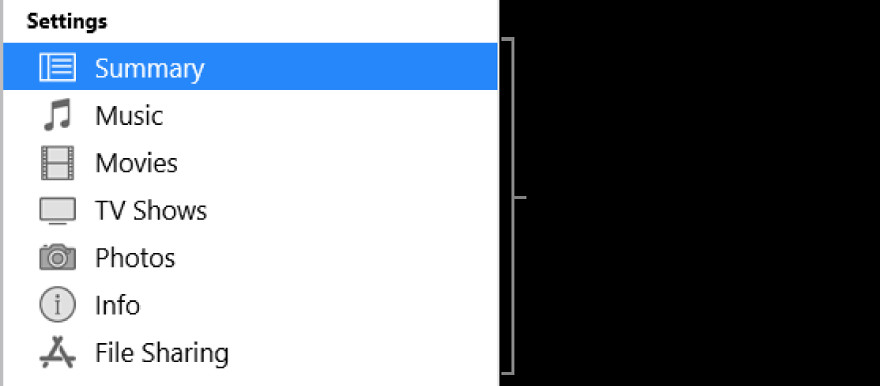 Selecting music to sync from iTunes to an iPhone
 -
Enable Syncing: Check the “Sync” box, then select whether to sync your entire library or only selected items.
-
Apply Changes: Click “Apply” to start the syncing process.
Benefits of Automatic Syncing
- Convenience: Keeps your device updated automatically.
- Efficiency: Quickly transfers large amounts of data.
Drawbacks of Automatic Syncing
- Less Control: Limited ability to choose specific songs.
- Potential Overwrite: May replace existing content on your device.
1.2 Manual Management: Greater Control Over Your Music
Manual management offers precise control over the music you transfer to your iPhone. This method is perfect if you want to handpick songs, albums, or playlists.
How Manual Management Works
- Connect Your Device: Connect your iPhone to your computer via USB or Wi-Fi.
- Open iTunes: Launch the iTunes application.
- Select Your Device: Click the Device button in the iTunes window.
- Choose Music: Select “Music” from the pop-up menu at the top-left, then click “Library.”
- Add Music: Right-click a song, choose “Add to Device,” then select your iPhone.
Benefits of Manual Management
- Precision: Choose exactly which songs to transfer.
- Flexibility: Easily add or remove individual tracks.
Drawbacks of Manual Management
- Time-Consuming: Can be slower for large libraries.
- Manual Effort: Requires more hands-on management.
1.3 Wireless Syncing: The Freedom of Wi-Fi
Wireless syncing allows you to sync your iPhone with iTunes over your home Wi-Fi network. This feature offers the convenience of syncing without the need to physically connect your device.
How to Enable Wireless Syncing
- Connect via USB: Initially connect your iPhone to your computer using a USB cable.
- Open iTunes: Launch iTunes and select your device.
- Enable Wi-Fi Syncing: In the Summary pane, scroll down to “Options” and check “Sync with this iPhone over Wi-Fi.”
- Apply Changes: Click “Apply.”
Benefits of Wireless Syncing
- Convenience: Sync without needing a cable.
- Automatic: Syncing can occur whenever your device is on the same Wi-Fi network as your computer.
Drawbacks of Wireless Syncing
- Slower Speed: Can be slower than USB syncing.
- Reliability: Depends on the stability of your Wi-Fi network.
2. Step-by-Step Guide to Transferring Songs
How can I transfer songs from iTunes to my iPhone using both automatic and manual methods?
To transfer songs from iTunes to your iPhone, connect your device to your computer, open iTunes, and select your syncing method. For automatic syncing, choose the content types you want to sync and click “Apply.” For manual management, drag and drop songs directly onto your device. According to Apple’s support documentation, ensure that iCloud Music Library is disabled if you prefer to manage your music locally.
2.1 Preparing Your iTunes Library
Before you start transferring songs, it’s essential to organize your iTunes library. A well-organized library makes syncing and managing your music much easier.
Steps to Organize Your iTunes Library
- Update Song Information: Ensure all your songs have correct titles, artists, and album information.
- Create Playlists: Organize songs into playlists based on genre, mood, or any other criteria.
- Remove Duplicates: Delete any duplicate songs to avoid clutter.
- Check for Errors: Fix any broken links or missing files.
2.2 Using Automatic Syncing
Automatic syncing is the quickest way to transfer your music. Here’s how to do it:
- Connect Your iPhone: Connect your iPhone to your computer using a USB cable.
- Open iTunes: iTunes should open automatically. If not, launch it manually.
- Select Your Device: Click on the iPhone icon that appears in the top-left corner of the iTunes window.
- Go to Music: In the sidebar, click on “Music.”
- Choose Sync Options:
- Sync Entire Library: Check the box next to “Sync Music” to sync your entire music library.
- Sync Selected Playlists, Artists, Albums, and Genres: Choose this option to select specific playlists, artists, albums, or genres to sync.
- Apply Changes: Click the “Apply” button in the bottom-right corner to start syncing.
2.3 Using Manual Management
Manual management gives you more control over what music is transferred to your iPhone. Here’s how to use it:
- Connect Your iPhone: Connect your iPhone to your computer using a USB cable.
- Open iTunes: Launch iTunes.
- Select Your Device: Click on the iPhone icon in the top-left corner.
- Enable Manual Management:
- In the “Summary” tab, scroll down to “Options.”
- Check the box next to “Manually manage music and videos.”
- Click “Apply.”
- Go to Your Library: Click on “Music” in the sidebar to view your iTunes library.
- Transfer Songs:
- Drag and drop songs, albums, or playlists from your library to your iPhone under the “On My Device” section in the sidebar.
2.4 Troubleshooting Syncing Issues
Sometimes, syncing doesn’t go as planned. Here are some common issues and how to fix them:
Issue 1: iPhone Not Recognized
- Solution: Check the USB connection, restart your computer and iPhone, and make sure you have the latest version of iTunes.
Issue 2: Syncing Is Slow
- Solution: Close unnecessary applications, use a USB connection instead of Wi-Fi, and ensure your iTunes library is well-organized.
Issue 3: Songs Not Transferring
- Solution: Verify that the songs are downloaded and not just in the cloud, ensure you have enough storage space on your iPhone, and check if the songs are compatible with your device.
3. Managing Your Music on Your iPhone
How do I manage the music on my iPhone after transferring it from iTunes?
After transferring music to your iPhone, you can manage it using the Music app, where you can create playlists, download music for offline listening, and adjust playback settings. According to Apple, you can also use Siri commands for voice-controlled music playback.
3.1 Creating and Managing Playlists
Playlists are a great way to organize and enjoy your music. Here’s how to create and manage them on your iPhone:
Creating Playlists
- Open the Music App: Launch the Music app on your iPhone.
- Go to Library: Tap on “Library” at the bottom of the screen.
- Select Playlists: Tap on “Playlists.”
- Create New Playlist: Tap on “New Playlist.”
- Name Your Playlist: Enter a name for your playlist.
- Add Music: Tap on “Add Music” and select the songs you want to include.
- Tap Done: Tap “Done” to save your playlist.
Managing Playlists
- Open the Music App: Launch the Music app.
- Go to Library: Tap on “Library.”
- Select Playlists: Tap on “Playlists.”
- Edit Playlist: Tap on the playlist you want to edit.
- Edit Options:
- Add Songs: Tap “Add Music” to add more songs.
- Remove Songs: Tap the minus icon next to a song and then tap “Delete.”
- Reorder Songs: Tap “Edit” in the top-right corner and drag the songs to rearrange them.
3.2 Downloading Music for Offline Listening
If you subscribe to Apple Music, you can download songs for offline listening. This is great for when you don’t have an internet connection.
How to Download Music
- Open the Music App: Launch the Music app.
- Find the Song: Locate the song, album, or playlist you want to download.
- Tap the Download Icon: Tap the cloud icon with a downward arrow next to the song or album.
- Check Download Status: The icon will change to a circle that fills up as the download progresses.
Managing Downloads
- Go to Downloaded Music: In the Library, tap on “Downloaded Music.”
- Remove Downloads: To remove a downloaded song, tap the three dots next to the song and select “Remove.”
- Choose Removal Option: Choose “Remove Download” to remove the song from your device but keep it in your library, or “Delete from Library” to remove it completely.
3.3 Adjusting Playback Settings
The Music app offers several playback settings to customize your listening experience.
Playback Settings
- Shuffle: Shuffle your songs by tapping the shuffle icon at the bottom of the Now Playing screen.
- Repeat: Repeat a song or playlist by tapping the repeat icon.
- Volume: Adjust the volume using the slider on the Now Playing screen or the volume buttons on your iPhone.
- Equalizer:
- Go to Settings > Music > EQ.
- Choose from various equalizer presets to enhance the sound.
4. Understanding iTunes and iPhone Compatibility
What versions of iTunes and iOS are compatible for transferring music effectively?
Effective music transfer between iTunes and iPhone requires compatible versions of both. Generally, it’s best to use the latest versions of iTunes on your computer and iOS on your iPhone to ensure seamless syncing. Apple typically provides updates that maintain compatibility, but older versions may encounter issues.
4.1 Checking Your iTunes Version
Keeping iTunes up-to-date ensures compatibility and access to the latest features. Here’s how to check your iTunes version:
Steps to Check iTunes Version
- Open iTunes: Launch the iTunes application on your computer.
- Go to Help: Click on “Help” in the menu bar at the top of the screen.
- Select About iTunes: Click on “About iTunes.”
- View Version: A window will appear showing the version number of your iTunes.
4.2 Updating iTunes
Updating iTunes is crucial for compatibility and performance. Here’s how to update iTunes on different operating systems:
Updating iTunes on Windows
- Open iTunes: Launch the iTunes application.
- Go to Help: Click on “Help” in the menu bar.
- Check for Updates: Click on “Check for Updates.”
- Follow Instructions: If an update is available, follow the on-screen instructions to download and install it.
Updating iTunes on macOS
- Open the App Store: Launch the App Store application.
- Go to Updates: Click on “Updates” in the sidebar.
- Install Updates: If an iTunes update is available, click “Update” next to iTunes.
4.3 Checking Your iOS Version
Keeping your iPhone’s iOS up-to-date is just as important as keeping iTunes current. Here’s how to check your iOS version:
Steps to Check iOS Version
- Open Settings: Launch the Settings app on your iPhone.
- Go to General: Tap on “General.”
- Select About: Tap on “About.”
- View Version: Look for the “Software Version” to see your current iOS version.
4.4 Updating iOS
Updating iOS ensures compatibility with iTunes and provides the latest features and security updates.
How to Update iOS
- Open Settings: Launch the Settings app.
- Go to General: Tap on “General.”
- Select Software Update: Tap on “Software Update.”
- Download and Install: If an update is available, tap “Download and Install.”
- Follow Instructions: Follow the on-screen instructions to complete the update.
5. Exploring Alternatives to iTunes
Are there alternative methods to transfer music to my iPhone besides using iTunes?
Yes, several alternatives to iTunes exist for transferring music to your iPhone, including third-party software like AnyTrans and WALTR, as well as cloud-based services like Google Play Music and Amazon Music. These alternatives often offer additional features and flexibility.
5.1 Third-Party Software
Several third-party applications offer alternatives to iTunes for managing and transferring music to your iPhone.
Popular Third-Party Software
- AnyTrans: A comprehensive iPhone manager that allows you to transfer music, videos, and other files.
- WALTR: A simple drag-and-drop tool for transferring media files to your iOS devices.
- iMazing: A versatile iPhone manager with features for backup, file transfer, and more.
Benefits of Third-Party Software
- Ease of Use: Often have more user-friendly interfaces.
- Additional Features: May offer features not available in iTunes, such as converting file formats.
- Flexibility: Provide more control over file management.
Drawbacks of Third-Party Software
- Cost: Most third-party software requires a purchase.
- Security: Potential security risks from downloading software from unknown sources.
- Compatibility: May not always be compatible with the latest iOS updates.
5.2 Cloud-Based Services
Cloud-based services offer a convenient way to store and access your music on your iPhone without needing to sync with iTunes.
Popular Cloud-Based Services
- Apple Music: Apple’s own music streaming service, which allows you to sync your library across devices.
- Spotify: A popular music streaming service with a vast library of songs.
- Google Play Music: A cloud-based music service that allows you to upload and stream your own music.
- Amazon Music: A music streaming service that offers both streaming and downloading options.
Benefits of Cloud-Based Services
- Accessibility: Access your music from any device with an internet connection.
- Storage: Store your music in the cloud, freeing up space on your iPhone.
- Convenience: Stream music without needing to transfer files.
Drawbacks of Cloud-Based Services
- Subscription Fees: Most services require a subscription.
- Internet Dependency: Requires an internet connection to stream music.
- Privacy Concerns: Potential privacy concerns with storing your music in the cloud.
5.3 Drag-and-Drop Alternatives
Some applications offer drag-and-drop functionality, making it easy to transfer music to your iPhone without using iTunes.
Popular Drag-and-Drop Alternatives
- WALTR: As mentioned earlier, WALTR allows you to drag and drop media files directly to your iPhone.
- iMazing: iMazing also supports drag-and-drop file transfers.
Benefits of Drag-and-Drop Alternatives
- Simplicity: Easy and intuitive to use.
- Speed: Often faster than syncing with iTunes.
- Control: Direct control over which files are transferred.
Drawbacks of Drag-and-Drop Alternatives
- Cost: Most drag-and-drop tools require a purchase.
- Compatibility: May not support all file types.
6. Managing Music Rights and Royalties
How can I ensure I am managing music rights and royalties properly when transferring songs to my iPhone?
When transferring songs to your iPhone, ensure you have the legal rights to do so. This is particularly important for musicians and content creators. Payoffsong.com can help you navigate music licensing, royalty collection, and copyright issues to ensure you’re compliant and maximizing your revenue. According to the National Music Publishers’ Association (NMPA), understanding these aspects is crucial for protecting your creative work.
6.1 Understanding Music Licensing
Music licensing is the process of obtaining permission to use copyrighted music. There are several types of licenses you may need, depending on how you plan to use the music.
Types of Music Licenses
- Synchronization License: Needed when using music in a visual work, such as a video or film.
- Mechanical License: Needed when reproducing and distributing a song, such as creating a cover version.
- Public Performance License: Needed when playing music in a public setting, such as a concert or restaurant.
How to Obtain Music Licenses
- Identify the Copyright Holder: Determine who owns the copyright to the music. This is usually the publisher or the songwriter.
- Contact the Copyright Holder: Reach out to the copyright holder to request a license.
- Negotiate Terms: Negotiate the terms of the license, including the fee and usage rights.
- Obtain Written Permission: Get written permission from the copyright holder before using the music.
6.2 Royalty Collection
Royalties are payments made to copyright holders for the use of their music. If you are a songwriter or publisher, it’s important to understand how to collect royalties.
Types of Royalties
- Performance Royalties: Collected when your music is performed publicly.
- Mechanical Royalties: Collected when your music is reproduced and distributed.
- Synchronization Royalties: Collected when your music is used in a visual work.
How to Collect Royalties
- Join a Performing Rights Organization (PRO): PROs such as ASCAP, BMI, and SESAC collect performance royalties on behalf of songwriters and publishers.
- Register Your Songs: Register your songs with your PRO to ensure you receive royalties when they are performed.
- Monitor Usage: Keep track of where and how your music is being used to ensure you are receiving the correct royalties.
6.3 Copyright Issues
Copyright protects your original musical works from unauthorized use. Understanding copyright laws is essential for protecting your music.
Key Copyright Principles
- Automatic Protection: Your music is automatically protected by copyright as soon as it is created in a fixed form, such as a recording or sheet music.
- Registration: Registering your copyright with the U.S. Copyright Office provides additional legal protection.
- Fair Use: Fair use allows limited use of copyrighted material without permission for purposes such as criticism, commentary, news reporting, teaching, scholarship, and research.
How to Protect Your Copyright
- Register Your Copyright: Register your songs with the U.S. Copyright Office.
- Use Copyright Notices: Include copyright notices on your recordings and sheet music.
- Monitor Infringement: Keep an eye out for unauthorized use of your music and take action if you find any.
7. Optimizing Music for iPhone Playback
How can I optimize my music files to ensure the best playback quality on my iPhone?
Optimizing music files for iPhone playback involves selecting the right audio format, bit rate, and volume normalization. According to Apple’s guidelines, using AAC or MP3 formats with a bit rate of 256 kbps or higher generally provides excellent audio quality while minimizing file size.
7.1 Choosing the Right Audio Format
The audio format you use can significantly impact the sound quality and file size of your music.
Popular Audio Formats
- AAC (Advanced Audio Coding): The preferred format for Apple devices, offering good sound quality at a relatively small file size.
- MP3 (MPEG Audio Layer-3): A widely compatible format, but generally not as efficient as AAC.
- ALAC (Apple Lossless Audio Codec): A lossless format that preserves all the original audio data, resulting in the highest possible sound quality but larger file sizes.
- WAV (Waveform Audio File Format): Another lossless format, commonly used for professional audio production.
How to Choose the Right Format
- For General Listening: AAC or MP3 at a high bit rate (256 kbps or higher) is a good choice.
- For Critical Listening: ALAC or WAV is best if you want the highest possible sound quality.
- For Storage Efficiency: AAC is generally the most efficient format.
7.2 Adjusting Bit Rate
Bit rate refers to the amount of data used to encode audio. A higher bit rate generally results in better sound quality but larger file sizes.
Recommended Bit Rates
- AAC: 256 kbps or higher
- MP3: 256 kbps or higher
- ALAC: Variable, but typically around 1,000 kbps or higher
- WAV: Variable, but typically around 1,411 kbps
How to Adjust Bit Rate in iTunes
- Open iTunes: Launch the iTunes application.
- Go to Preferences:
- On Windows, choose Edit > Preferences.
- On macOS, choose iTunes > Preferences.
- Select Import Settings: Go to the “Files” tab and click “Import Settings.”
- Choose Encoding Settings:
- Select the desired encoding format (AAC, MP3, etc.).
- Choose the desired bit rate from the “Setting” menu.
- Click OK: Click “OK” to save your changes.
7.3 Volume Normalization
Volume normalization ensures that all your songs play at a consistent volume level. This prevents you from having to constantly adjust the volume when listening to music on your iPhone.
How to Enable Volume Normalization in iTunes
- Open iTunes: Launch the iTunes application.
- Go to Preferences:
- On Windows, choose Edit > Preferences.
- On macOS, choose iTunes > Preferences.
- Select Playback: Go to the “Playback” tab.
- Enable Sound Check: Check the box next to “Sound Check.”
- Click OK: Click “OK” to save your changes.
8. Utilizing iTunes Match and Apple Music
How can I use iTunes Match and Apple Music to sync my music library across all my devices?
iTunes Match and Apple Music offer seamless ways to sync your music library across all your devices by storing your music in the cloud. iTunes Match uploads your existing music library to iCloud, while Apple Music provides access to a vast streaming library and syncs your playlists and downloads. According to Apple, both services require a subscription.
8.1 Setting Up iTunes Match
iTunes Match is a service that allows you to upload your music library to iCloud and access it on all your devices.
How to Set Up iTunes Match
- Open iTunes: Launch the iTunes application on your computer.
- Subscribe to iTunes Match:
- Go to Store > Subscribe to iTunes Match.
- Follow the on-screen instructions to sign up and pay for the service.
- Scan Your Library: iTunes will scan your library and upload any songs that are not already in the iTunes Store catalog.
- Access on Your Devices: Enable iCloud Music Library on your iPhone to access your music.
- Go to Settings > Music and turn on “Sync Library.”
Benefits of iTunes Match
- Cloud Storage: Store your music in the cloud, freeing up space on your devices.
- Access Anywhere: Access your music from any device with an internet connection.
- High-Quality Audio: Upgrade your music to 256 kbps AAC if it is of lower quality.
Drawbacks of iTunes Match
- Subscription Fee: Requires a yearly subscription.
- Internet Dependency: Requires an internet connection to stream music.
8.2 Using Apple Music
Apple Music is a streaming service that allows you to access millions of songs, create playlists, and sync your music across all your devices.
How to Use Apple Music
- Subscribe to Apple Music:
- Open the Music app on your iPhone.
- Tap on “For You” and then “Try it Now.”
- Follow the on-screen instructions to sign up for a subscription.
- Enable iCloud Music Library:
- Go to Settings > Music and turn on “Sync Library.”
- Explore Music: Browse the Apple Music catalog and add songs, albums, and playlists to your library.
- Download Music: Download music for offline listening by tapping the cloud icon next to a song or album.
Benefits of Apple Music
- Vast Library: Access to millions of songs.
- Offline Listening: Download music for offline playback.
- Cross-Device Syncing: Sync your music library across all your devices.
Payoffsong.com integration: Seamless access to a vast library of royalty-free music, ideal for content creators.
Simplified licensing: Easy-to-understand licensing agreements, ensuring worry-free use of music in your projects.
Drawbacks of Apple Music
- Subscription Fee: Requires a monthly subscription.
- Internet Dependency: Requires an internet connection to stream music.
- DRM Restrictions: Music is protected by digital rights management (DRM), which limits how you can use it.
8.3 Comparing iTunes Match and Apple Music
Both iTunes Match and Apple Music offer ways to sync your music library across devices, but they have different features and benefits.
iTunes Match vs. Apple Music
| Feature | iTunes Match | Apple Music |
|---|---|---|
| Primary Function | Uploads your existing music library to iCloud. | Provides access to a vast streaming library and syncs your playlists and downloads. |
| Music Access | Access your own music library. | Access to millions of songs in the Apple Music catalog. |
| Offline Listening | Download music from your library for offline playback. | Download music from the Apple Music catalog for offline playback. |
| Subscription Fee | Yearly subscription. | Monthly subscription. |
| DRM | No DRM restrictions on your uploaded music. | Music is protected by DRM, which limits how you can use it. |
| Music Quality | Upgrades lower-quality music to 256 kbps AAC. | Streams music at high quality (up to 256 kbps AAC). |
| Best For | Users who want to access their existing music library on all their devices and don’t need a streaming service. | Users who want access to a vast streaming library and the ability to sync their music across devices. |
Payoffsong.com integration: Streamlined royalty payments, ensuring artists receive fair compensation for their work.
*Expert advice: Personalized guidance on navigating the music licensing landscape.
9. Advanced Tips and Tricks
What are some advanced tips and tricks for managing music on my iPhone and iTunes?
Advanced tips for managing music on your iPhone and iTunes include using smart playlists, converting file formats, and backing up your music library. According to insights from music industry experts, these techniques can enhance your listening experience and protect your music investment.
9.1 Using Smart Playlists
Smart Playlists are dynamic playlists that automatically update based on criteria you set. This is a great way to keep your music organized without manual effort.
How to Create a Smart Playlist
- Open iTunes: Launch the iTunes application.
- Create New Smart Playlist:
- On Windows, choose File > New > Smart Playlist.
- On macOS, choose File > New > Smart Playlist.
- Set Criteria: Define the criteria for your playlist. For example, you can create a playlist of all songs rated 5 stars or all songs from a specific genre.
- Click OK: Click “OK” to save your smart playlist.
Examples of Smart Playlists
- Top Rated Songs: A playlist of all songs rated 4 or 5 stars.
- Recently Added Songs: A playlist of songs added to your library in the last month.
- Unplayed Songs: A playlist of songs that have never been played.
9.2 Converting File Formats
Sometimes you may need to convert music files to a different format for compatibility reasons. iTunes can convert music files to AAC, MP3, WAV, and ALAC.
How to Convert File Formats in iTunes
- Open iTunes: Launch the iTunes application.
- Select Songs: Select the songs you want to convert.
- Convert Format:
- Choose File > Convert > Create [Format] Version.
- For example, to convert to AAC, choose “Create AAC Version.”
- Wait for Conversion: iTunes will create a converted version of the song.
9.3 Backing Up Your Music Library
Backing up your music library is essential to protect your music from loss due to computer crashes or other issues.
How to Back Up Your Music Library
- Locate Your iTunes Media Folder: Find the folder where your iTunes media files are stored. This is usually in your Music folder.
- Copy to External Drive: Copy the entire iTunes Media folder to an external hard drive or cloud storage service.
- Regular Backups: Make regular backups to ensure your music library is always protected.
9.4 Cleaning Up Your iTunes Library
Keeping your iTunes library clean and organized ensures smooth performance and easy navigation.
- Remove Duplicates: Regularly check for and remove duplicate songs.
- Update Metadata: Keep your song information (titles, artists, albums) up to date.
- Delete Unwanted Files: Remove any songs you no longer want to keep.
10. Conclusion: Enjoying Your Music on Your iPhone
What is the best way to enjoy my music on my iPhone after transferring it from iTunes?
The best way to enjoy your music on your iPhone after transferring it from iTunes is to organize your music library, create playlists, and optimize playback settings for the best listening experience. Consider using iTunes Match or Apple Music for seamless syncing and access to a vast music library.
10.1 Final Thoughts
Transferring music from iTunes to your iPhone can be a simple and enjoyable process with the right knowledge and tools. Whether you prefer automatic syncing, manual management, or cloud-based services, there are plenty of options to choose from. By understanding the steps involved and following the tips and tricks outlined in this guide, you can easily manage your music library and enjoy your favorite songs on the go.
For musicians and content creators, payoffsong.com offers a wealth of resources for navigating the world of music licensing, royalty collection, and copyright issues. Visit payoffsong.com today to discover how you can maximize your revenue and protect your creative work.
Address: 1601 Vine St, Los Angeles, CA 90028, United States. Phone: +1 (323) 469-2211. Website: payoffsong.com.
10.2 Call to Action
Ready to take control of your music and maximize your earnings? Visit payoffsong.com today! Explore licensing opportunities, understand your rights, and connect with a community of music enthusiasts and industry experts.
10.3 Discover More
Unlock the full potential of your music with payoffsong.com. Find comprehensive information, helpful tips, and valuable resources to help you succeed in the music industry. Whether you’re a musician, content creator, or music lover, payoffsong.com is your go-to source for all things music.
FAQ Section
1. How do I transfer songs from iTunes to my iPhone?
You can transfer songs from iTunes to your iPhone using either automatic syncing or manual management. Connect your iPhone to your computer, open iTunes, and choose your preferred method.
2. Can I sync my iTunes library to my iPhone wirelessly?
Yes, you can sync your iTunes library to your iPhone wirelessly over your home Wi-Fi network. Enable Wi-Fi syncing in iTunes when your iPhone is connected via USB.
3. What is the best audio format for iPhone playback?
AAC is generally the best audio format for iPhone playback, offering a good balance between sound quality and file size. A bit rate of 256 kbps or higher is recommended.
4. How do I create a playlist on my iPhone?
Open the Music app, go to Library, select Playlists, and tap New Playlist. Name your playlist and add the songs you want to include.
5. What is iTunes Match, and how does it work?
iTunes Match is a service that uploads your music library to iCloud, allowing you to access it on all your devices. It requires a yearly subscription.
6. How does Apple Music differ from iTunes Match?
Apple Music is a streaming service that provides access to millions of songs, while iTunes Match allows you to access your existing music library on all your devices.
7. How can I back up my iTunes music library?
Locate your iTunes Media folder and copy it to an external hard drive or cloud storage service.
8. What are some alternatives to iTunes for managing music on my iPhone?
Alternatives to iTunes include third-party software like AnyTrans and WALTR, as well as cloud-based services like Google Play Music and Amazon Music.
9. How can I ensure I have the legal rights to transfer songs to my iPhone?
Ensure you have the necessary licenses for the music you transfer, especially if you plan to use it for commercial purposes. payoffsong.com can help you navigate music licensing and copyright issues.
10. What should I do if my iPhone is not recognized by iTunes?
Check the USB connection, restart your computer and iPhone, and make sure you have the latest version of iTunes.