
Transferring music from your iPod to your computer can be a simple process, unlocking opportunities to manage and enjoy your music library. At payoffsong.com, we provide solutions to ensure you not only retrieve your cherished songs but also explore options to potentially monetize your music. Let’s explore some safe and effective ways to transfer your music, while also introducing you to ways to gain song royalties, music licensing and even sync licensing.
1. What Are The Common Reasons To Transfer Songs From An iPod To A Computer?
There are several reasons why you might want to transfer music from your iPod to your computer:
- Backing up your music library: This is crucial in case your computer’s hard drive fails or your iPod is lost or damaged.
- Moving music to a new computer: When you get a new computer, transferring your music ensures you don’t lose your collection.
- Creating a master library: Consolidating music from multiple sources into one central location makes management easier.
- Sharing music (legally): Creating backups lets you share music with family, provided it aligns with copyright laws and terms of service.
- Editing and managing files: Transferring to a computer allows for easier editing of metadata, creating playlists, and organizing music.
Transferring your music can provide you with peace of mind, flexibility, and control over your personal music collection. You can also discover ways to earn money from your music by visiting payoffsong.com
2. What Are The Legal Considerations Before Transferring Music?
Before transferring music from your iPod to your computer, it’s essential to consider the legal aspects to ensure you’re not violating any copyright laws.
- Copyright Law: Copyright law protects the rights of music creators, including composers, lyricists, and recording artists. Unauthorized copying or distribution of copyrighted music is illegal and can result in significant penalties. According to the U.S. Copyright Office, copyright infringement can lead to statutory damages ranging from $750 to $30,000 per work infringed.
- Fair Use: Fair use is a legal doctrine that allows limited use of copyrighted material without permission from the rights holders for purposes such as criticism, commentary, news reporting, teaching, scholarship, and research. However, fair use is determined on a case-by-case basis, and it’s essential to understand the limitations.
- Personal Use: Generally, making copies of music for your personal use is considered acceptable, provided that you legally acquired the music in the first place. This includes ripping CDs you own or downloading music from authorized sources. However, distributing these copies to others or using them for commercial purposes is not allowed.
- Terms of Service: Many digital music platforms, such as iTunes and Spotify, have terms of service agreements that outline the rules for using their services. These agreements often restrict the transfer or copying of music beyond personal use.
- Music Licensing: If you plan to use the music for commercial purposes, such as in a video, advertisement, or public performance, you’ll need to obtain the necessary licenses from the copyright holders. This typically involves contacting the music publisher or a licensing agency to request permission and pay the appropriate fees.
Understanding these legal considerations is crucial to ensure that you’re using music legally and ethically. For more information on music licensing and copyright, visit payoffsong.com.
3. How Can I Transfer Purchased Music From My iPod To My Computer Using iTunes/Music App?
If you purchased your music through the iTunes Store (now known as the Music app on macOS Catalina and later), transferring it back to your computer is straightforward:
-
Update to the Latest Version: Make sure you have the latest version of iTunes (or the Music app) installed on your computer.
-
Authorize Your Computer:
- Open iTunes or the Music app.
- Go to Account > Authorizations > Authorize This Computer.
- Enter your Apple ID and password.
-
Connect Your iPod: Use a USB cable to connect your iPod to your computer.
-
Transfer Purchases:
- In iTunes, go to File > Devices > Transfer Purchases from [Your iPod Name].
- In the Music app, your iPod should appear in the sidebar. Right-click on it and select Transfer Purchases.
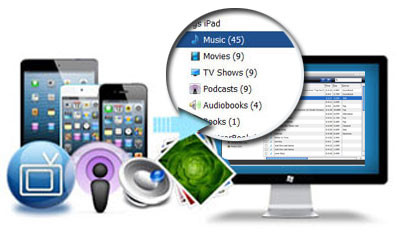 Transferring purchases from iPod to iTunes
This process will copy all purchased music, apps, and other content from your iPod to your computer’s iTunes/Music library. This ensures your legally obtained music is safely stored on your computer and is easy to manage. If you’re interested in learning how to earn revenue from your original music, be sure to check out payoffsong.com.
4. What If My Music Wasn’t Purchased Through iTunes?
If your music wasn’t purchased through iTunes, the process is a bit more complicated, but still manageable:
- Using Third-Party Software: Several third-party programs can help you transfer music from your iPod to your computer. These tools often bypass the restrictions imposed by iTunes and allow you to copy music files directly.
- Examples of Third-Party Software:
- iMazing: A popular choice for managing iOS devices, iMazing allows you to transfer music, files, and other data between your iPod and computer.
- CopyTrans: This software specializes in transferring music and playlists from your iPod to iTunes or directly to your computer.
- AnyTrans: Similar to iMazing and CopyTrans, AnyTrans offers a comprehensive solution for managing iOS device content.
- Examples of Third-Party Software:
- Manual Transfer (For Older iPods): Older iPod models can sometimes be used as external hard drives, allowing you to manually copy music files:
- Enable Disk Use: Connect your iPod to your computer and open iTunes. Select your iPod, go to the “Summary” tab, and check “Enable disk use.”
- Show Hidden Files: On Windows, open File Explorer, go to “View,” and check “Hidden items.” On macOS, press Command + Shift + . (period) to show hidden files.
- Access Music Folder: Open the iPod drive and navigate to the “iPod_Control” folder, then “Music.”
- Copy Files: Copy the music files to a folder on your computer. Note that the files may have cryptic names.
- Import to iTunes/Music: In iTunes or the Music app, go to “File” > “Add Folder to Library” and select the folder where you copied the music.
- Using iTunes Match or Apple Music:
- iTunes Match: If you subscribe to iTunes Match, you can upload your entire music library to iCloud and then download it to any authorized device.
- Apple Music: With an Apple Music subscription, you can sync your library across devices, making your music accessible on your computer.
5. What Are The Step-by-Step Instructions For Using Third-Party Software Like iMazing?
iMazing is a popular third-party software for transferring music from your iPod to your computer. Here’s a step-by-step guide:
-
Download and Install iMazing: Go to the iMazing website (https://imazing.com/) and download the software for your operating system (Windows or macOS). Install the application following the on-screen instructions.
-
Connect Your iPod: Use a USB cable to connect your iPod to your computer.
-
Launch iMazing: Open the iMazing application on your computer.
-
Select Your iPod: iMazing should automatically detect your iPod. Select your device from the list.
-
Manage Music: In the iMazing interface, find and click on the “Music” section. This will display all the music on your iPod.
-
Choose Music to Transfer: Select the songs, albums, or playlists you want to transfer to your computer. You can use the checkboxes to select individual items or select all.
-
Transfer to Computer: Click the “Copy to Computer” button. A dialog box will appear asking you to choose a destination folder on your computer. Select the folder where you want to save the music.
-
Start Transfer: Click “OK” or “Choose” to start the transfer process. iMazing will copy the selected music files from your iPod to the specified folder on your computer.
-
Import to iTunes/Music (Optional): If you want to add the transferred music to your iTunes or Music library, open iTunes/Music, go to “File” > “Add Folder to Library,” and select the folder where you saved the music.
6. What Should I Do If I Encounter Common Transfer Problems?
Encountering issues while transferring music from your iPod to your computer can be frustrating. Here are some common problems and how to troubleshoot them:
-
iPod Not Recognized:
- Problem: Your computer doesn’t recognize your iPod when you connect it.
- Solutions:
- Check the USB Connection: Try a different USB port or cable.
- Restart Your Computer and iPod: Sometimes a simple restart can resolve connectivity issues.
- Update iTunes/Music App: Ensure you have the latest version of iTunes or the Music app installed.
- Update Drivers (Windows): In Device Manager, locate your iPod under “Portable Devices,” right-click, and select “Update driver.”
-
Transfer Errors:
- Problem: The transfer process starts but then fails or gets interrupted.
- Solutions:
- Check for Disk Errors: Run a disk check on both your computer and iPod to identify and fix any file system errors.
- Free Up Space: Make sure you have enough free space on your computer’s hard drive to accommodate the transferred music.
- Close Other Applications: Close any unnecessary applications running in the background to free up system resources.
-
Missing or Corrupted Files:
- Problem: Some music files are missing after the transfer, or they appear corrupted.
- Solutions:
- Re-transfer the Files: Try transferring the problematic files again.
- Check the Original Files: Ensure the original music files on your iPod are not corrupted.
- Use a Different Transfer Method: Try using a different third-party software or method to transfer the music.
-
iTunes Sync Issues:
- Problem: iTunes is not syncing correctly with your iPod, causing transfer issues.
- Solutions:
- Authorize Your Computer: Ensure your computer is authorized in iTunes (Account > Authorizations > Authorize This Computer).
- Disable iCloud Music Library: Temporarily disable iCloud Music Library in iTunes preferences to avoid conflicts.
- Update iOS: Make sure your iPod has the latest version of iOS installed.
-
Software Compatibility Issues:
- Problem: The transfer software is not compatible with your operating system or iPod model.
- Solutions:
- Check Compatibility: Verify that the software you are using is compatible with your computer’s operating system and your iPod model.
- Update Software: Ensure you have the latest version of the transfer software installed.
- Try Alternative Software: If compatibility issues persist, try using a different transfer program.
7. What Are The Best Practices For Managing My Music Library After Transferring?
After successfully transferring your music from your iPod to your computer, it’s important to manage your music library effectively. Here are some best practices:
-
Organize Your Music Files:
- Folder Structure: Create a well-organized folder structure to store your music files. A common approach is to use folders for each artist, with subfolders for each album.
- File Naming: Use consistent and descriptive file names that include the song title, artist, and album. For example, “Artist – Album – Track Number – Song Title.mp3”.
-
Edit Metadata:
- Complete Metadata: Ensure that all your music files have complete metadata, including the artist, album, track number, song title, genre, and album art.
- Use Music Management Software: Use music management software like iTunes/Music, MusicBee, or MediaMonkey to edit metadata easily.
-
Create Playlists:
- Categorize Your Music: Create playlists based on genres, moods, activities, or any other criteria that make sense to you.
- Smart Playlists: Use smart playlists to automatically update playlists based on specific rules and criteria.
-
Back Up Your Music Library:
- Regular Backups: Regularly back up your entire music library to an external hard drive, cloud storage service, or another secure location.
- Multiple Backups: Consider maintaining multiple backups in different locations to protect against data loss.
-
Use Cloud Storage:
- Cloud Services: Utilize cloud storage services like Google Drive, Dropbox, or OneDrive to store and access your music library from anywhere.
- Sync Across Devices: Sync your music library across multiple devices using cloud storage or music streaming services.
-
Optimize Storage:
- Lossless vs. Lossy: Understand the difference between lossless (e.g., FLAC, ALAC) and lossy (e.g., MP3, AAC) audio formats. Choose the appropriate format based on your storage capacity and audio quality preferences.
- Compress Files: If storage space is limited, consider compressing your music files to a lower bitrate.
-
Regularly Update Your Library:
- Add New Music: Regularly add new music to your library and update metadata as needed.
- Remove Duplicates: Periodically scan your library for duplicate files and remove them to save storage space.
-
Legal Considerations:
- Copyright Compliance: Ensure that you are only managing music that you have legally acquired and have the right to use.
- Licensing: If you plan to use your music for commercial purposes, obtain the necessary licenses from the copyright holders.
8. Can I Use Cloud Storage Services To Backup My Music Library?
Yes, using cloud storage services to back up your music library is a practical and secure method. Here’s how to leverage cloud storage for your music:
-
Choosing a Cloud Storage Service:
- Popular Options: Some popular cloud storage services include Google Drive, Dropbox, OneDrive, iCloud Drive, and Amazon Drive.
- Storage Capacity: Evaluate how much storage space you need based on the size of your music library. Most services offer free storage tiers with limited space, and paid plans for larger storage needs.
- Cost: Compare the pricing plans of different cloud storage services to find one that fits your budget.
- Features: Consider additional features such as file sharing, collaboration tools, and mobile apps.
-
Uploading Your Music Library:
- Organize Your Files: Ensure your music library is well-organized with a clear folder structure and consistent file naming conventions.
- Select Files to Upload: Choose the folders containing your music files and upload them to your chosen cloud storage service.
- Upload Methods: You can upload files through the web interface, desktop app, or mobile app of the cloud storage service.
- Initial Upload Time: The initial upload may take some time, depending on the size of your library and your internet connection speed.
-
Organizing Music in the Cloud:
- Mirror Your Local Structure: Replicate your local folder structure within the cloud storage service to maintain consistency.
- Metadata: Cloud storage services generally do not read or display music metadata. Metadata management remains on your local devices.
-
Accessing Your Music:
- Streaming: Some cloud services allow you to stream your music directly from the cloud through their apps.
- Downloading: You can download your music files to any device from the cloud storage service for offline playback.
- Syncing: Use the syncing feature of the cloud service to keep your local and cloud libraries synchronized. Any changes you make locally will be automatically reflected in the cloud, and vice versa.
-
Security and Privacy:
- Encryption: Ensure that the cloud storage service uses encryption to protect your data both in transit and at rest.
- Password Protection: Use a strong, unique password for your cloud storage account.
- Two-Factor Authentication: Enable two-factor authentication for added security.
-
Backup Strategy:
- Regular Updates: Regularly update your music library in the cloud to include any new additions or changes.
- Multiple Backups: While cloud storage is reliable, it’s still a good idea to maintain a local backup as well for added redundancy.
-
Integration with Music Players:
- Cloud-Based Music Players: Some music players integrate directly with cloud storage services, allowing you to stream your music directly from the cloud without downloading it.
- Third-Party Apps: Use third-party apps that can connect to your cloud storage and play your music.
9. What Are The Copyright Implications Of Storing Music In The Cloud?
Storing music in the cloud has several copyright implications that users need to be aware of to ensure they remain compliant with copyright laws.
-
Personal Use vs. Distribution:
- Personal Use: Storing legally acquired music in the cloud for personal use is generally permissible. This includes music you have purchased from digital stores, ripped from CDs you own, or obtained through legitimate means.
- Distribution: Uploading copyrighted music to the cloud and sharing it with others without permission from the copyright holders is a violation of copyright law. This is considered unauthorized distribution.
-
Terms of Service of Cloud Providers:
- Compliance: Cloud storage providers have terms of service that users must adhere to. These terms often prohibit the uploading and sharing of copyrighted material without proper authorization.
- Content Monitoring: Some cloud providers may monitor user content for copyright infringement and may take action, such as removing infringing material or suspending accounts.
-
Copyright Infringement Liability:
- Direct Infringement: Uploading and sharing copyrighted music without permission constitutes direct copyright infringement, and you could be held liable for damages.
- Indirect Infringement: Even if you are not directly sharing the music, storing a large quantity of copyrighted material in the cloud without proper authorization could potentially lead to claims of indirect infringement.
-
Fair Use Considerations:
- Limited Application: The fair use doctrine allows limited use of copyrighted material for purposes such as criticism, commentary, news reporting, teaching, scholarship, and research. However, fair use is determined on a case-by-case basis and typically does not apply to storing entire music libraries in the cloud.
-
Licensing Requirements:
- Commercial Use: If you intend to use the music stored in the cloud for commercial purposes, such as in a business setting or for public performance, you will need to obtain the necessary licenses from the copyright holders.
- Streaming Services: If you use a cloud-based music streaming service, ensure that the service has obtained the necessary licenses to stream the music to you.
-
Recommendations for Compliance:
- Legally Acquired Music: Only upload music to the cloud that you have legally acquired and have the right to use.
- Avoid Sharing Infringing Material: Do not share copyrighted music with others without permission from the copyright holders.
- Review Terms of Service: Carefully review the terms of service of your cloud storage provider to ensure you are in compliance.
- Obtain Licenses: If you intend to use the music for commercial purposes, obtain the necessary licenses from the copyright holders.
-
Penalties for Copyright Infringement:
- Statutory Damages: Copyright infringement can result in statutory damages ranging from $750 to $30,000 per work infringed.
- Actual Damages: Copyright holders can also seek actual damages, which may include lost profits and other financial losses.
- Criminal Penalties: In some cases, copyright infringement can result in criminal penalties, such as fines and imprisonment.
10. How Can I Potentially Earn Money From My Music After Transferring It?
Transferring your music from your iPod to your computer opens up several avenues for potentially earning money from your creative work. Here are some strategies to consider:
-
Music Licensing:
- Licensing Platforms: Register your music with licensing platforms like payoffsong.com, Songtrust, or Harry Fox Agency. These platforms help connect your music with potential licensees, such as filmmakers, advertisers, and content creators.
- Types of Licenses: Understand the different types of licenses, including synchronization licenses (for use in visual media), mechanical licenses (for reproduction of your music), and performance licenses (for public performances).
- Set Competitive Rates: Research industry standards and set competitive licensing rates for your music.
-
Sync Licensing:
- Film and TV: Pitch your music to music supervisors for inclusion in films, TV shows, and commercials. Sync licenses can be very lucrative, especially if your music is used in a popular production.
- Video Games: Explore opportunities to license your music for use in video games.
- Online Content: Target online content creators, such as YouTubers and streamers, who may need music for their videos and live streams.
-
Publishing Administration:
- Collect Royalties: Ensure you are collecting all the royalties you are entitled to as a songwriter and publisher. This includes performance royalties, mechanical royalties, and sync royalties.
- Performance Rights Organizations (PROs): Register with a PRO like ASCAP, BMI, or SESAC to collect performance royalties when your music is played publicly.
- Global Collection: If your music is played internationally, consider using a publishing administrator to collect royalties from around the world.
-
Direct Sales and Streaming:
- Digital Distribution: Distribute your music through digital distribution platforms like DistroKid, TuneCore, or CD Baby to make it available on streaming services like Spotify, Apple Music, and Amazon Music.
- Direct Sales: Sell your music directly to fans through your own website or platforms like Bandcamp.
- Set Competitive Prices: Research industry standards and set competitive prices for your music.
-
Creating Music for Specific Projects:
- Custom Music: Offer to create custom music for specific projects, such as commercials, video games, or corporate videos.
- Freelance Platforms: Market your services on freelance platforms like Fiverr or Upwork.
- Build a Portfolio: Create a portfolio of your best work to showcase your skills and attract potential clients.
-
Teaching and Workshops:
- Music Lessons: Offer private music lessons to students of all ages and skill levels.
- Workshops and Seminars: Host workshops and seminars on songwriting, music production, and music business topics.
- Online Courses: Create and sell online courses on platforms like Udemy or Teachable.
-
Live Performances:
- Gigs and Concerts: Perform your music live at gigs, concerts, and festivals.
- Touring: If you have a large enough fan base, consider organizing a tour.
- Merchandise: Sell merchandise like CDs, vinyl records, t-shirts, and posters at your live performances.
-
Monetizing YouTube:
- Create a YouTube Channel: Create a YouTube channel and upload videos of your music.
- Monetization: Enable monetization on your YouTube channel to earn revenue from ads.
- Collaborate with Other YouTubers: Collaborate with other YouTubers to reach a wider audience.
-
Crowdfunding:
- Fund New Projects: Use crowdfunding platforms like Kickstarter or Indiegogo to fund new music projects, such as recording an album or making a music video.
- Offer Rewards: Offer rewards to your backers, such as signed copies of your music, exclusive merchandise, or a private concert.
By exploring these various avenues, you can potentially turn your passion for music into a sustainable source of income. Remember that success in the music industry often requires a combination of talent, hard work, and business acumen. For more insights and opportunities, visit payoffsong.com.
FAQ: Transferring Music From iPod To Computer
- Is it legal to transfer music from my iPod to my computer?
- It depends. Transferring legally purchased music for personal use is generally acceptable. However, distributing copyrighted music without permission is illegal.
- Can I transfer music purchased from iTunes to a non-Apple computer?
- Yes, you can. Authorize your computer in iTunes and transfer the purchases. The music will be in a compatible format.
- What if my iPod is not recognized by my computer?
- Try a different USB port, restart your computer and iPod, and ensure iTunes is updated. If problems persist, update drivers (Windows) or check for hardware issues.
- Will transferring music erase the content on my iPod?
- No, the transfer process should not erase content on your iPod unless you choose to delete files manually.
- What is the best software for transferring music from iPod to computer?
- Popular options include iMazing, CopyTrans, and AnyTrans, known for their user-friendly interfaces and reliability.
- How do I transfer music from an old iPod to a new computer without iTunes?
- Use third-party software like iMazing or CopyTrans. These tools bypass iTunes restrictions for easier transfer.
- Can I use iCloud to transfer my music library?
- Yes, if you subscribe to iTunes Match or Apple Music, you can upload your library to iCloud and access it on any authorized device.
- What should I do if some songs are missing after the transfer?
- Re-transfer the files and ensure the original files on your iPod are not corrupted. Try a different transfer method if necessary.
- How can I organize my music library after transferring?
- Create a consistent folder structure, edit metadata, create playlists, and back up your library regularly.
- Are there any alternatives to using a USB cable for transferring music?
- Cloud storage services like Google Drive or Dropbox can be used, but this requires uploading all your music to the cloud first.
Ready to explore the possibilities of your music? Visit payoffsong.com today to discover licensing opportunities, copyright information, and a community of music enthusiasts. Take the next step in your music journey!
Address: 1601 Vine St, Los Angeles, CA 90028, United States
Phone: +1 (323) 469-2211
Website: payoffsong.com